
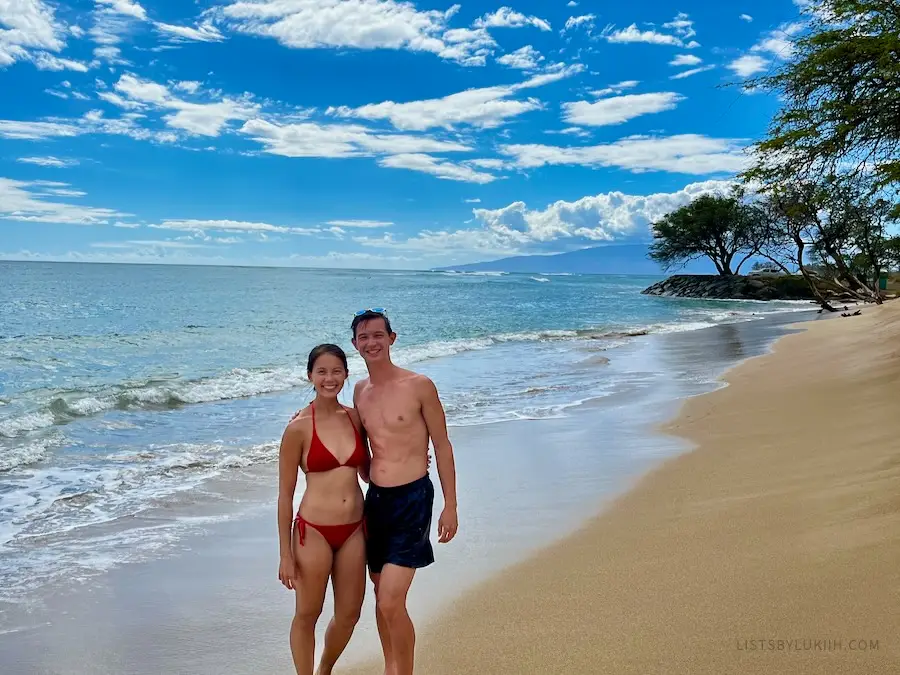
One of Hawaii’s most visited islands, Maui has beautiful beaches and snorkeling sites, an epic volcano sunrise and a scenic drive on the Road to Hana featuring over 40 natural stops.
I spent eight days in Maui and here, I share practical tips on visiting it. This post covers:
- 🗓️ 5-day optimized itinerary
- 🏖️ Amazing things to do
- 📍 Map with key places pinned
- 🚙 How to get around
- 🏠 Where to stay
- ✏️ Maui trip planner
Lists By Lukiih is readers-supported. When you buy with my affiliate link, I may earn a small commission. Thanks!
Maui at a Glance
Here’s some general information on Maui to help you plan your trip.
🌋 Known For
Maui, also called “The Valley Isle,” is one of the most visited islands in Hawaii and the second-largest one within the Hawaiian archipelago.
Maui is known for its beautiful beaches, the Haleakalā National Park that is home to the Haleakalā volcano, the scenic road trip on the Road to Hana, and its amazing snorkeling sites that are abundant in tropical fish and diverse marine life.
The five-day itinerary below incorporates all the great things that Maui is known for.
📍Location
One of the most popular Hawaiian islands, Maui is located in the Pacific Ocean and is part of the United States.
☀️ Best Time To Visit
The two best times to visit Maui are during one of its shoulder seasons or the summer season.
- During the shoulder season, which runs from April to May or September to October, Maui’s weather is pleasant with average temperatures of 72°F to 83°F. There are fewer crowds and better deals during this time. I visited Maui in September and enjoyed the climate and smaller crowds.
- During the summer season, which runs from June to August, Maui has sunny weather with average temperatures of 72°F to 87°F. Water activities, like snorkeling and diving, are best during this time.
- The winter season, which runs from December to March, is Maui’s peak season as visitors escape their own winter climates to enjoy the island’s warmer climate.
Maui doesn’t have a rainy season like most tropical places, but the wettest months coincide with the winter season. Here’s a comprehensive Maui packing list, regardless of the season.
🗓️ How Long To Visit
You’ll need at least three days to enjoy Maui if you’re visiting several Hawaiian islands, but most visitors spend five days or more there.
- With just three days in Maui, you’ll only be able to visit a few of its top attractions. For example, you won’t have much time for much else if you do the Road to Hana, one of Maui’s most popular activities that require a full day or can be split into two days.
- With five days in Maui, you’ll be able to do many of the island’s most popular activities and see its best beaches and natural attractions, like the sunrise at Haleakalā volcano. Below is a great five-day itinerary for Maui.
- With one week or more in Maui, you’ll be able to do the above and also have more downtime, but you won’t run out of things to do. Like many others, I stayed eight days in Maui and could have stayed longer.
💰 Is Maui Expensive To Visit?
Hawaii is the most expensive state in the United States to travel to and Maui is the most expensive island.
- A mid-range budget traveler can easily spend $300 a day in Maui.
- A budget traveler can spend $180 a day in Maui and anything lower will require a bit of inconvenience.
That said, visiting Maui is still cheaper than visiting some of the United State’s most expensive cities (e.g., New York City, San Francisco, Key West).
Maui has good credit card infrastructure, but some places still require cash, so bring at least $50 in US dollars. Money-related tips and all my Maui travel expenses are detailed in this Hawaii trip cost breakdown.
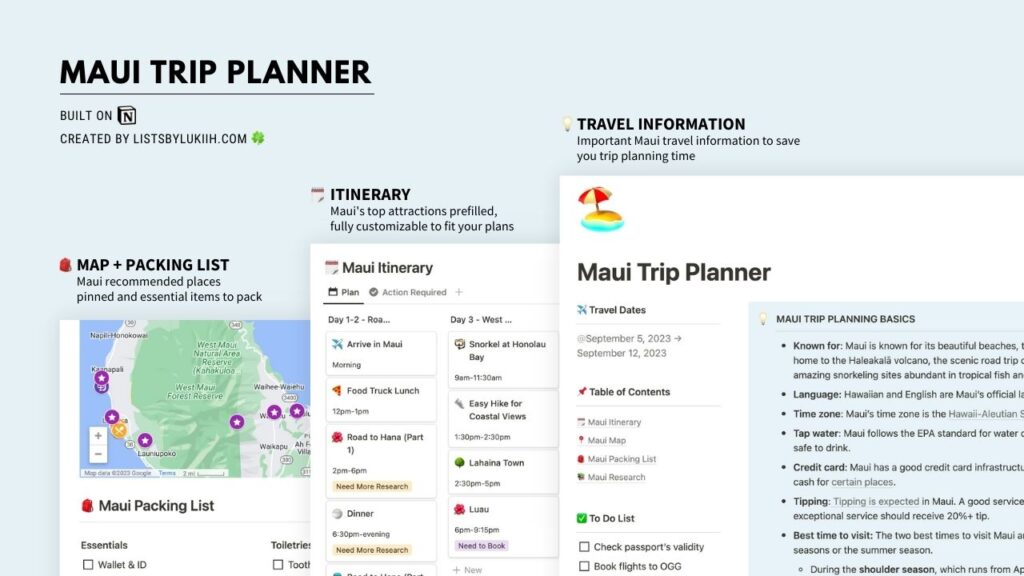
All the information above is available in the Maui trip planner in a downloadable Notion.
Getting Around Maui
Once you land in Maui’s only international airport, Kahului Airport, the primary way to get around Maui is by driving a rental car (like most of the United States).
Aside from driving, other ways to get around Maui include walking, ridesharing and taking the limited public bus.
🚙 Rental Car
Most convenient transportation: The best way to get around Maui is by driving. Maui is divided into five regions (West Maui, Central Maui, East Maui, South Maui and Upcountry Maui) and you will need to rent a car to travel between regions.
You will also need to rent a car to explore some of Maui’s top natural attractions: the Road to Hana, Haleakalā Volcano and Iao Valley State Park.
Rental car prices: A standard rental car in Maui, if booked at least one month in advance, will cost about $30 a day, not including gas.
Road conditions: Maui has narrow roads (like the Road to Hana) that are also winding (like the road to Haleakalā Volcano), but they’re generally in decent condition. Heads up that traffic can be bad on the island, especially on the weekends, but at least you’ll get some scenic drives next to the ocean.
Parking: When renting a car in Maui, know that it’s standard to pay $2 to $10 for parking near popular towns, beaches and attractions.
🩴 Walking
Within a town or resort in Maui, you can park your rental car and explore the area on foot. For example, I found both the towns of Paia in Upcountry and Lahaina in South Maui to be pedestrian-friendly. I also visited a few resorts and found them relatively easy to walk around.
🚌 Bus
Maui has a limited bus system that connects the major towns around the island, but it won’t take you to some of the top natural attractions. At $2 for a one-way bus ride, taking the bus is one of the most cost-effective, but time-consuming, ways to get around Maui.
🚕 Taxis and Ridesharing Apps
Taxis, Uber and Lyft are all available in Maui and will be more expensive than a rental car unless you’re using them for a few one-off rides.
When I was in Maui, a one-way Uber ride from south Maui to the Kahului Airport was the same price as the cost of a rental car for an entire day (~$30).
Maui Map With Recommended Places
This Maui map has all the recommended places pinned and organized by itinerary day.
5-Day Itinerary for Maui
Below is a great way to spend five days in Maui while doing some of the best things the island has to offer.
This five-day itinerary is the improved version of my and my sister’s separate eight-day trips to Maui. I’ve included some of our actual timestamps to give you an idea of how long you might need for each activity and how to efficiently sequence things.
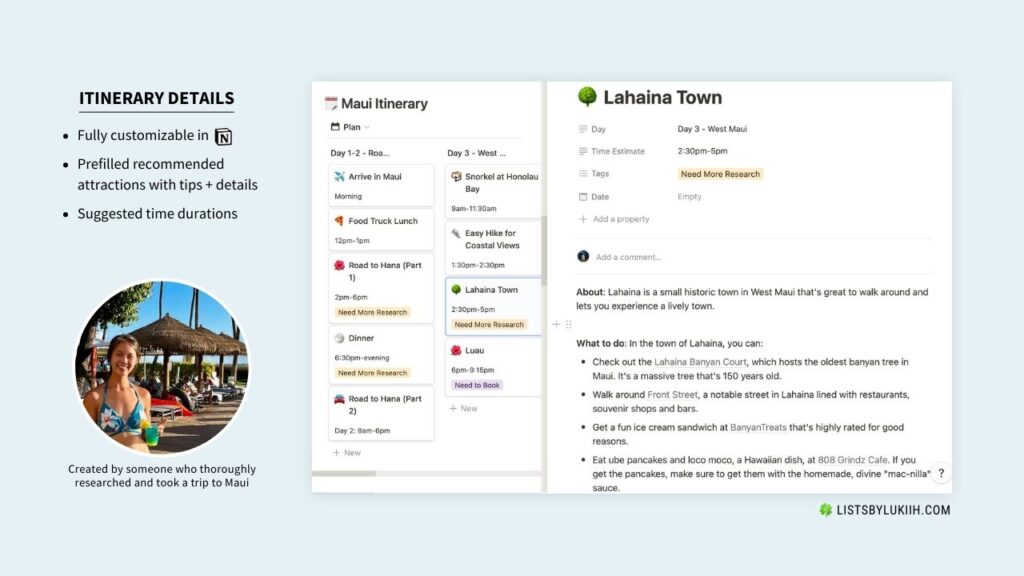
Maui Itinerary
The Maui trip planning template below has this itinerary prefilled.
| Day 1 | Road to Hana ✈️ Arrive in Maui (morning) 🍚 Have lunch at a food truck park (12–1 pm) 🚙 Start the beautiful road trip on the Road to Hana (2–6 pm) 🏠 Eat dinner and settle down (6:30 pm-evening) |
| Day 2 | Road to Hana 🚙 Complete the scenic Road to Hana (8 am–6 pm) |
| Day 3 | West Maui 🤿 Snorkel at Honolau Bay or another West Maui snorkeling site (9–11:30 am) 👟 Do an easy hike at Kapalua Coastal or Dragon’s Teeth Trail (1:30–2:30 pm) 🌳 Explore the historic town of Lahaina (2:30–5 pm) 🌸 Attend a luau as your dinner with entertainment (6–9:15 pm) |
| Day 4 | Haleakalā Sunrise + Fruit Farm 🌋 Wake up for the epic Haleakalā sunrise (3–8 am) 🥾 Optional hike at Haleakalā National Park (morning to early afternoon) 🍍 Take a fruit farm tour (early to mid-afternoon) ☀️ Catch a sunset at a beach (evening) |
| Day 5 | Central + South Maui 🏖️ Snorkel at Turtle Town or Kamaole Beach (9–11:30 am) ✨ Explore Central Maui (afternoon to evening) |
This complete Maui packing list accounts for activities mentioned in the itinerary above.
5-Day Maui Itinerary Details
This five-day itinerary was thoughtfully put together to take full advantage of your time in Maui. It contains all the top activities and popular things that Maui is known for.
Activities are sequenced efficiently to minimize transportation time while balancing active and relaxing days across your trip.
Day 1: Start the Road to Hana
Stop #1: Food Truck Lunch
After arriving at Kahului Airport on your first day, start your Maui trip by eating at a food truck park.
🤔 Why: Maui is known to have an abundance of food truck parks where you can choose from various vendors that serve fresh food thanks to local farms.
🛻 Getting there: Plate Lunch Market Place is a five-minute drive from Maui’s airport and is one of the five biggest food truck parks in Maui. Here, you’ll find Thai food, acai bowls, burgers, poke bowls, tacos, shrimp plates and more.
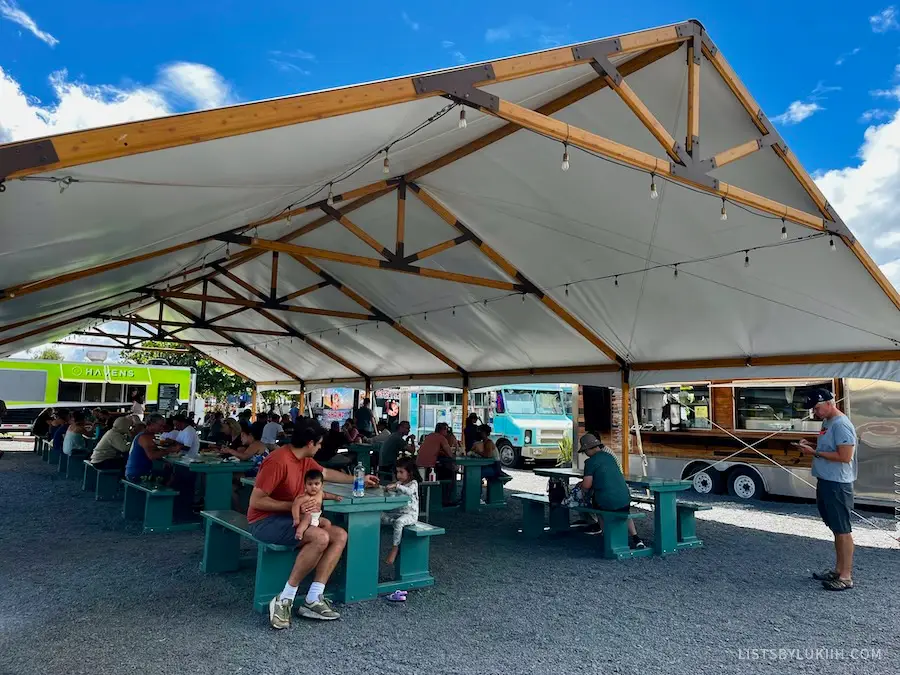
💰 Expected cost: You can expect to spend $12 to $20 for a meal at any of Maui’s food trucks. My pad thai at Thai Mee Up was $13 for a large dish.
Most food trucks accept credit cards, but some are cash-only, so make sure to bring at least $25 in cash per person.
🍀 My take: Food trucks may not have the best food in Maui, but sitting outside in the sun, having multiple food options and not having to worry about seating right after landing in Hawaii is a great way to kick off your trip.
Alternatively, you can go to the extremely popular Tin Roof restaurant that’s an eight-minute drive from the Maui airport. This Hawaiian restaurant serves amazing poke and mochiko chicken rice bowls, but there’s no place to sit and there will likely be a wait around lunchtime.
Stop #2: Start the Road to Hana
After lunch, drive 20 minutes east of Maui’s airport to the start of Road to Hana.
🤔 Why: The Road to Hana is a 64-mile coastal road trip that showcases Maui’s natural beauty and is one of the island’s top attractions. The road passes through waterfalls, hikes, views, rainforests and beaches.
🚗 Getting there: The Road to Hana starts here at the zero mile marker on Route 36 (which is also called Hana Highway) and ends in the Kaupo district in East Maui.
⏰ Suggested duration: Many visitors who’ve done the Road to Hana, including myself, recommend splitting the Road to Hana into two days. It’s possible to do it in a single day, but you’ll have less time to explore your favorite stops.
🌺 Stops to do: On the first day on the Road to Hana, aim to get to Honomanū Bay or if you’re feeling ambitious, Keanae Lookout. There are more than eight stops along the way, but you’ll realistically be able to visit four to five of them during the first day. Some of the best stops are:
- Ho’okipa Lookout. Ho’okipa Beach Park is a brief nice, first stop that gives you a preview of Maui’s beautiful beaches. Many people like surfing here, and people sometimes see green sea turtles at the beach.
- Twin Falls. The Twin Falls hike is a short, easy one-mile hike that passes through a swimming hole with a cliff jump and leads to a small waterfall. This is a great way to shake out your legs after being on a plane and in a car for a while.
- Honomanū Bay. Honomanū Bay is a “hidden” black sand beach that requires a bit of off-roading to get to. If your experience is anything like mine, you won’t find many visitors here.
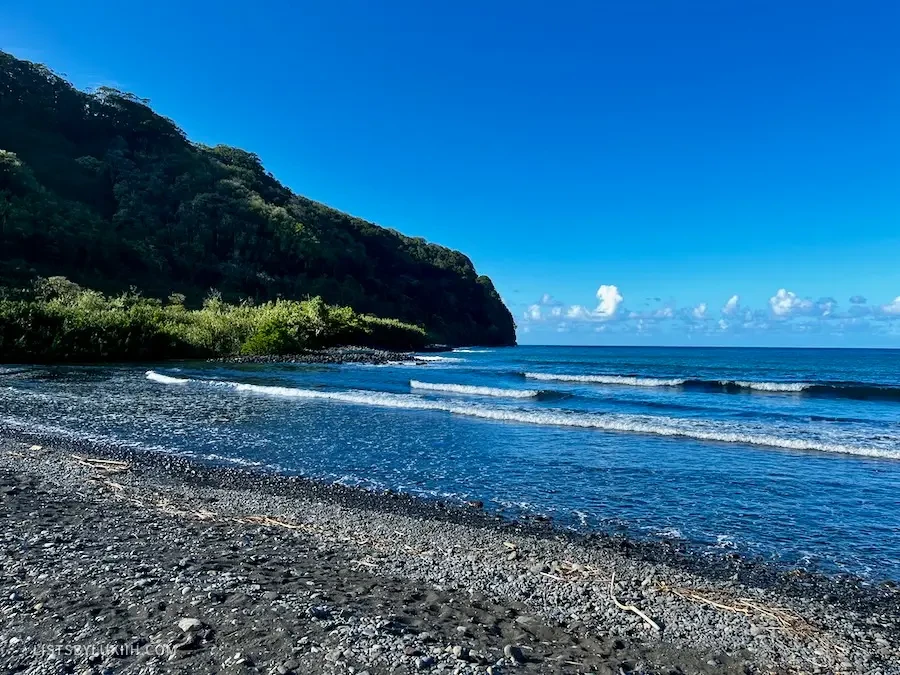
🍀 My take: Doing the Road to Hana upon arrival might be too much for some people, but I think it’s a great introduction to Maui as you pass through diverse natural sceneries. I thoroughly enjoyed kicking off my Maui trip with this road trip and recommend it to anyone who wants to maximize their time on the island.
The Road to Hana has over 40 beautiful stops, but its road conditions can be rough. This Road to Hana complete guide has a map of all stops and shares how to best prepare for this road trip.
Stop #3: Dinner and Accommodation
After driving the first portion of the Road to Hana, you have two options:
- You can drive back to your accommodation, which is what I did (here’s where I stayed).
- Stay somewhere on the Road to Hana, which is the more efficient thing to do. However, there are limited accommodations on the road and most of them will be in the town of Hana, which is quite far away as well.
🐠 Dinner: If you’re driving back (option 1 above), you can make a dinner stop in the town of Paia or near your accommodation’s location.
- The town of Paia in Central Maui is near the start of the Road to Hana. Mama’s Fish House is considered to be one of the island’s best restaurants and requires advanced reservations and Paia Fish Market Restaurant is a well-known and more affordable seafood chain.
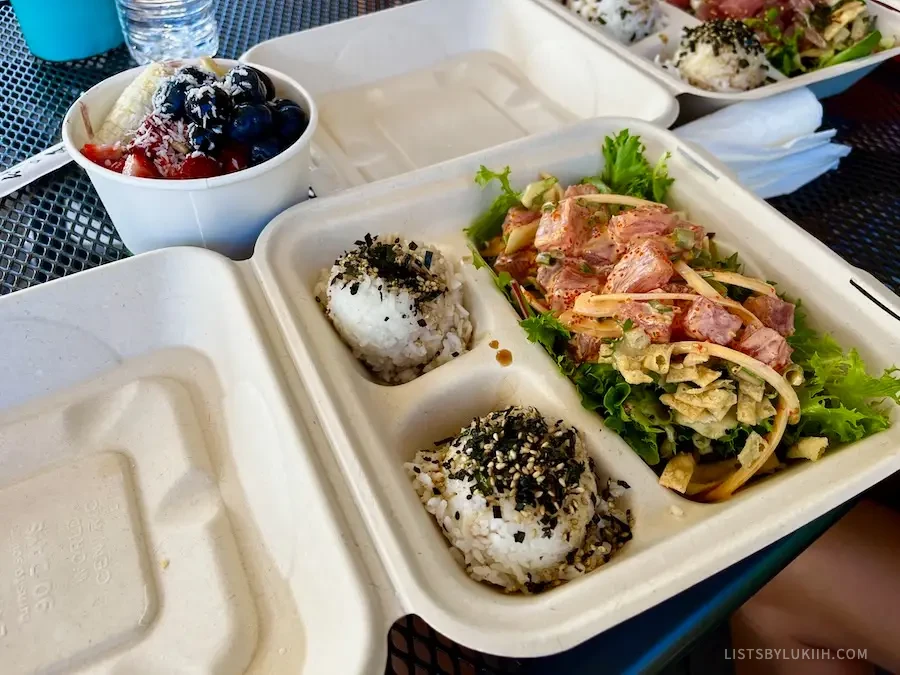
- If you’re staying in West or South Maui, there are several great restaurant options, but a pro tip is that Foodland, the Hawaiian supermarket, serves amazing, fresh poke at a reasonable price. There’s a Foodland in Lahaina in West Maui and one in Kihei in South Maui.

Day 2: Complete the Road to Hana
On your second day in Maui, get an early 8 am start to complete the Road to Hana so that you have enough time to enjoy the views and hikes before it gets dark.
All-day Activity: Road to Hana
🚗 Getting there: This time, start the Road to Hana from the south side in the Kaupo district.
🌺 Stops to do: This Road to Hana complete guide has a map of all the stops on this road trip, but two standout stops for the southern half of the road trip are:
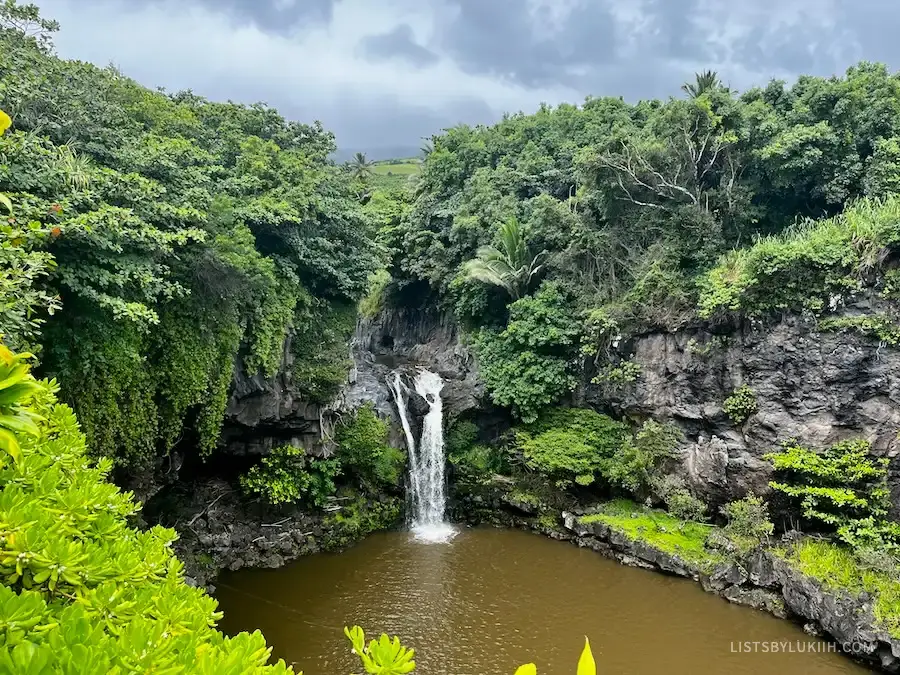
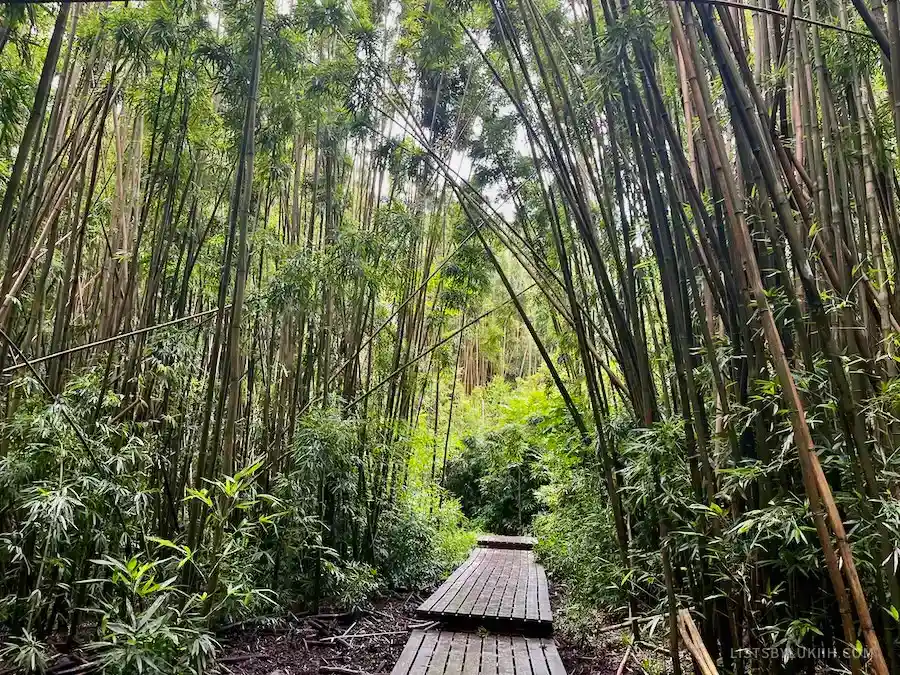
- Pīpīwai Trail. The Pipiwai Trail is a 3.8-mile out-and-back, easy trail where you walk through a forest of bamboo to reach Waimoku Falls, a tall waterfall that you can look at from afar.
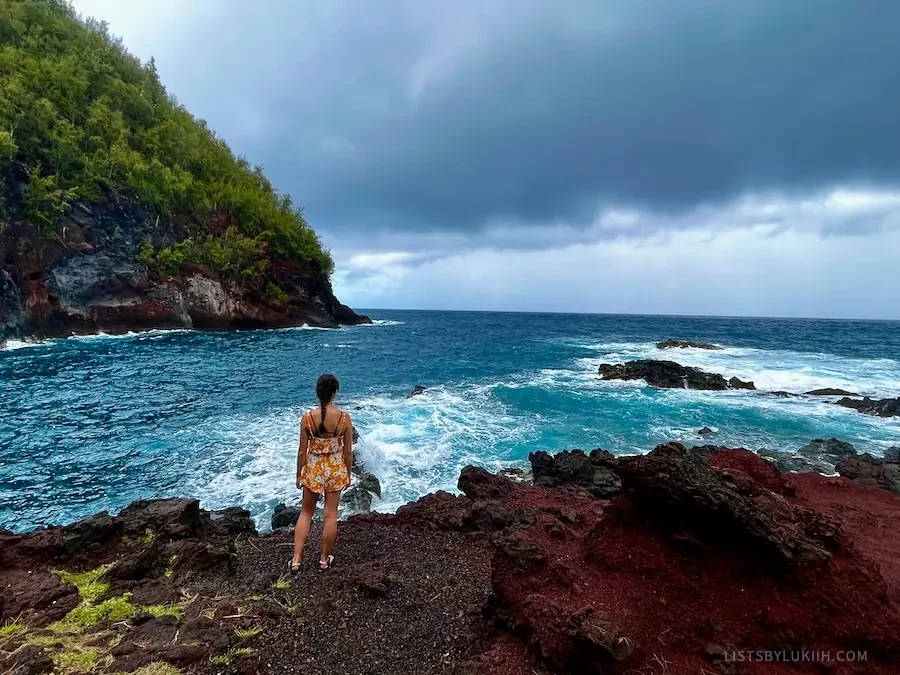
- Kaihalulu Beach. Kaihalulu Beach, also known as the Red Sand Beach, is a stunning, hidden cove where the sand is red and the ocean is intensely turquoise blue. It’s also one of the more challenging places to get to, which adds to the adventure.
🍀 My take: The Road to Hana is as much about the journey as the destinations. While you may be tempted to see as many stops as possible, you’ll have a better experience if you spend meaningful time at the stops you like most.
If you don’t feel comfortable doing the Road to Hana because of the road conditions, this well-rated, small-group Road to Hana tour will provide transportation and stop at the highlights.
Day 3: Explore West Maui
After finishing the Road to Hana the previous day, spend your third day doing quintessential Hawaiian activities in West Maui.
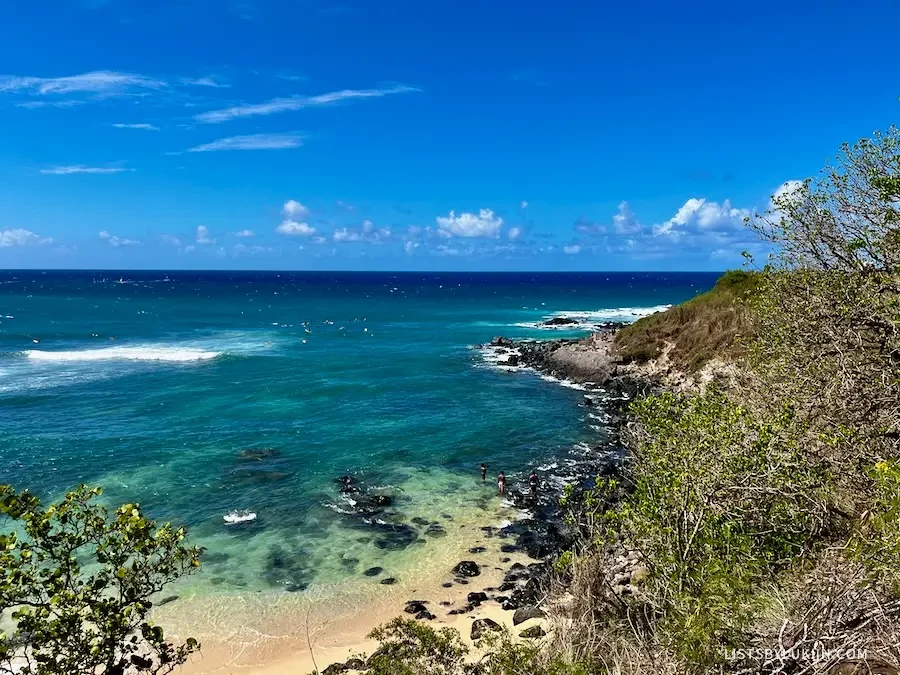
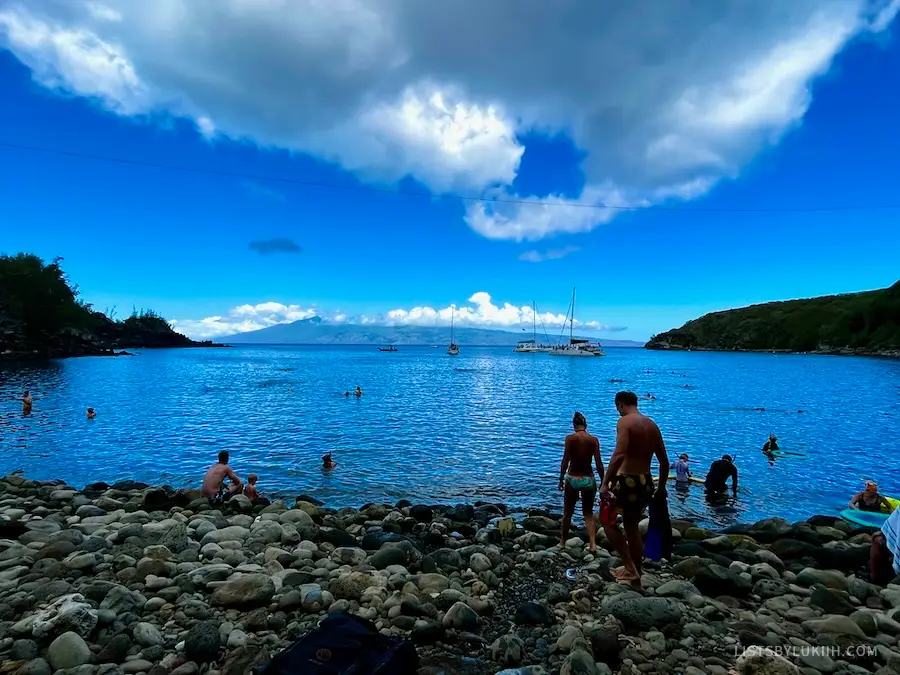
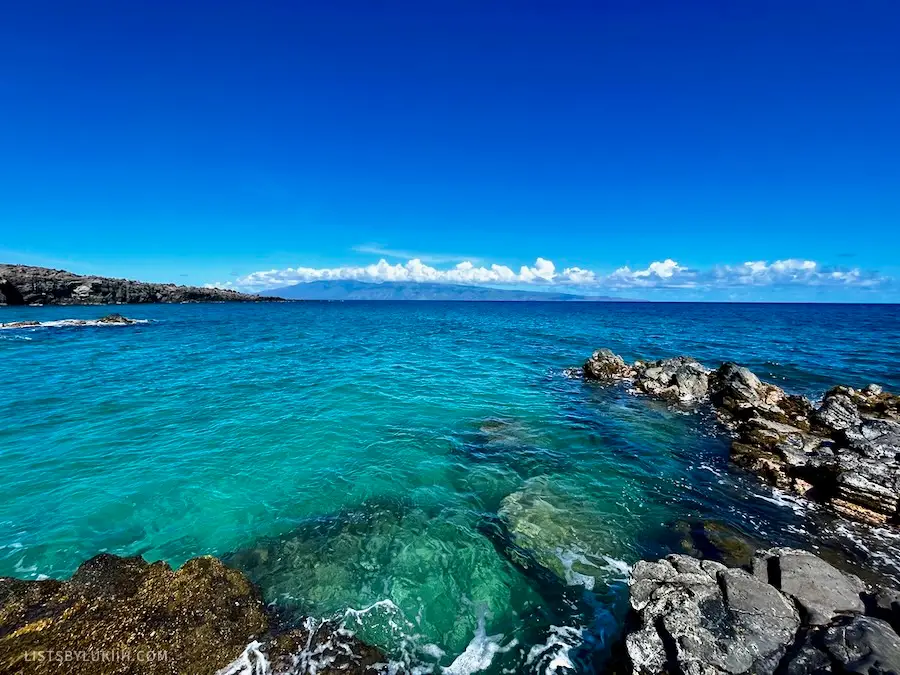
Stop #1: Snorkel at Honolua Bay
Start your day by snorkeling, one of the best activities in Maui.
🤔 Why: Honolua Bay, a protected area, is regarded as one of the best places to snorkel in Maui. The water is extremely blue and full of colorful fish and coral reefs.
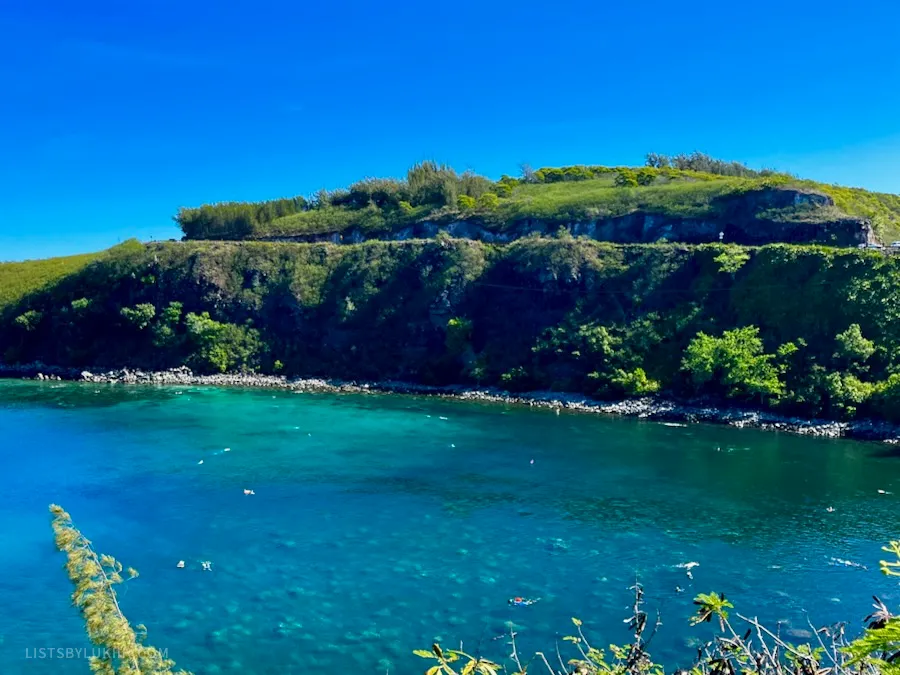
🚗 Getting there: Honolua Bay is located on the very north end of West Maui, but it’s worth the drive. To get to the bay, you have to do a brief walk through the Honolua Bay Access Trail.
There’s no parking, so you’ll have to park on the side of the road for Honolua Bay. Make sure to get there early. I got there at 9:15 am in September and had to park 10 minutes away from the access trail because it was already crowded.
Honolua Bay is not a beach. There is no white sand at the bay; you’ll have to get in and out of the bay by walking on slippery rocks, so be careful.
⏰ Suggested duration: You can spend one to two hours snorkeling in Honolua Bay.
💰 Expected cost: Free; Honolua Bay has no entrance or parking fee.
Honolua Bay is protected, so you’re not allowed to bring spray sunscreen and should wear reef-safe sunscreen. I like this brand of reef-safe sunscreen because I think it spreads easily.
🍀 My take: Honolua Bay is one of the best snorkeling sites I went to in Hawaii. Despite the crowds, the bay was large enough to snorkel without anyone around you, especially if you go deeper into it. I also enjoyed the brief walk through the Hawaiian jungle on the access trail.
🤿 Other West Maui Snorkeling Sites
If you find that Honolua Bay is too crowded or inaccessible, here are other nearby snorkeling sites in West Maui that visitors rate highly:
- Napili Bay. A 10-minute drive south of Honolua Bay, Napili Bay can be calm on some days and the ocean water by the beach is only four-feet deep. It has a beach, parking lot and bathrooms, so it’s more accessible than Honolua Bay.
- Kapalua Bay Beach. A 10-minute drive south of Hanolua Bay, Kapalua Bay Beach is a protected cove where snorkelers can see sea turtles and eels. Like Napili Bay, it has a beach, parking lot and bathrooms.
- Ka’anapali Beach. A 16-minute drive south of Honolua Bay, Ka’anapali Beach is located next to a few resorts, so it gets extremely crowded. The snorkeling here wasn’t as great as the other beaches in my opinion, but this site has the popular Black Rock cliff jumping spot, which is scary, but thrilling to jump off.
If you want to be further out in the ocean and have logistics taken care of, this highly-rated snorkeling tour visits both Honolua Bay and Ka’anapali’s coastline.
Stop #2: Hike the Kapalua Coastal or Dragon’s Teeth’s Trail
After snorkeling and lunch, take an easy hike along the ocean.
🤔 Why: Maui boasts accessible hikes with beautiful coastal views.
- The Kapalua Coastal Trail is not that well-known, so you get to see the popular Dragon’s Teeth from afar without having to deal with the crowds. The trail also has interesting rocks and tide pools where you can spend time exploring around.
- Dragon’s Teeth Trail is an easy, popular hike that leads to pointed rocks with a beautiful view. From afar, the rocks look like a set of dragon’s teeth.
⏰ Suggested duration: Both these hikes should take you about an hour or less, including the time you might spend admiring the view and exploring nearby tide pools.
💰 Expected cost: Both trails have free parking and no entrance fee.
🍀 My take: There are other great and much harder hikes in Maui that you’ll enjoy if you’re active like me, but between the Road to Hana and the next day’s early start time, it’s a good idea to take it easy on day 3.
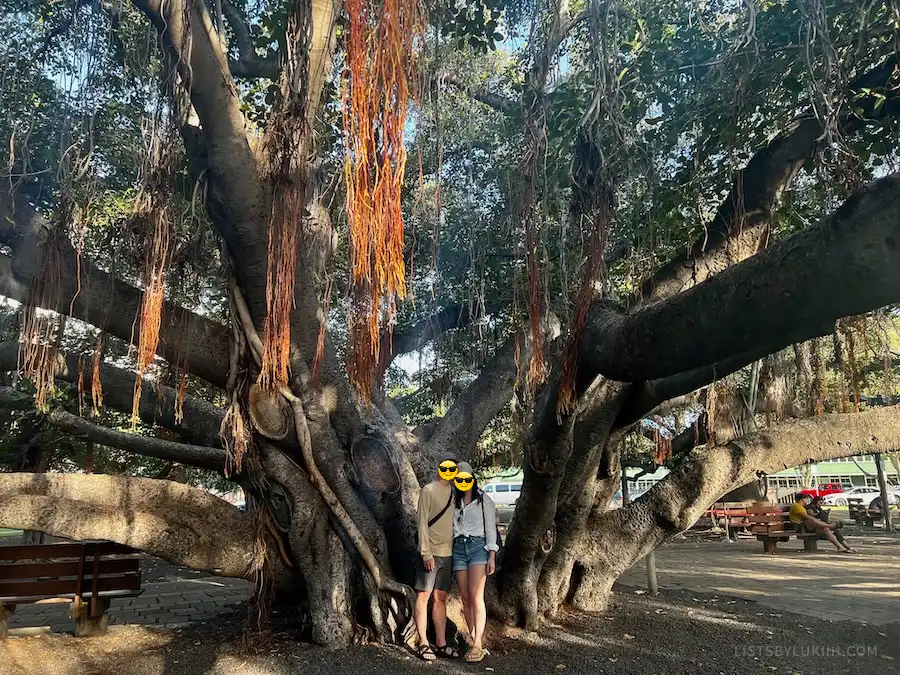
Stop #3: Explore the town of Lahaina
After your easy hike, drive 15 minutes south to Lahaina.
🤔 Why: Lahaina is a small, but lively, historic town in West Maui that’s great to walk around.
🍦 What to do: In the town of Lahaina, you can:
- Check out the Lahaina Banyan Court, which hosts the oldest banyan tree in Maui. It’s a massive tree that’s 150 years old.
- Walk around Front Street, a notable street in Lahaina lined with restaurants, souvenir shops and bars.
- Get a fun ice cream sandwich at BanyanTreats that’s highly rated for good reasons.
- Eat ube pancakes and loco moco, a Hawaiian dish, at 808 Grindz Cafe. If you get the pancakes, make sure to get them with the homemade, divine “mac-nilla” sauce.
- Enjoy some fresh fish at Paia Fishmarket, which is a well-known seafood chain in Hawaii. They often have a wait, but the line moves fast.
- Go whale watching. A popular thing to do from Lahaina that requires a higher commitment, whale watching is especially popular during the winter months.
🚙 Getting there: Lahaina has several free public parking lots. Pick any lot, park in it and start walking to Front Street.
⏰ Suggested duration: You can spend several hours to a whole afternoon walking around Lahaina. I spent about three hours there which included dining in for a meal.
🍀 My take: Walking around Lahaina town is a nice break from all the outdoor and natural activities that will dominate your Maui itinerary. It’s also a great place to get Maui gifts and souvenirs.
Stop #4: Attend a luau
If you want to fit in one more activity on your third day, reserve a luau in advance.
🤔 Why: A luau is a traditional Hawaiian celebratory feast that’s usually paired with entertainment, such as live music, hula dancing, lei making, fire dancing and more.
📍 Where: Maui has several places that offer luaus every night. Old Lahaina Luau and Feast at Lele are two of the best-rated luaus on the island.
Luaus at popular places must be reserved weeks in advance if you want guaranteed seating.
⏰ Duration: Most luaus last three hours and require you to show up 15 to 30 minutes before the start time, which is usually between 5:30 pm and 6:30 pm.
💰 Expected cost: You’ll spend approximately $200 per person for a luau in Maui. You can find cheaper ones for as low as $150 and the most expensive ones will be closer to $300.
🍀 My take: From what I’ve been told, a luau is a fun and quintessential experience in Hawaii. I wasn’t able to make one because I attended a Maui wedding instead, but would have liked to experience one otherwise.
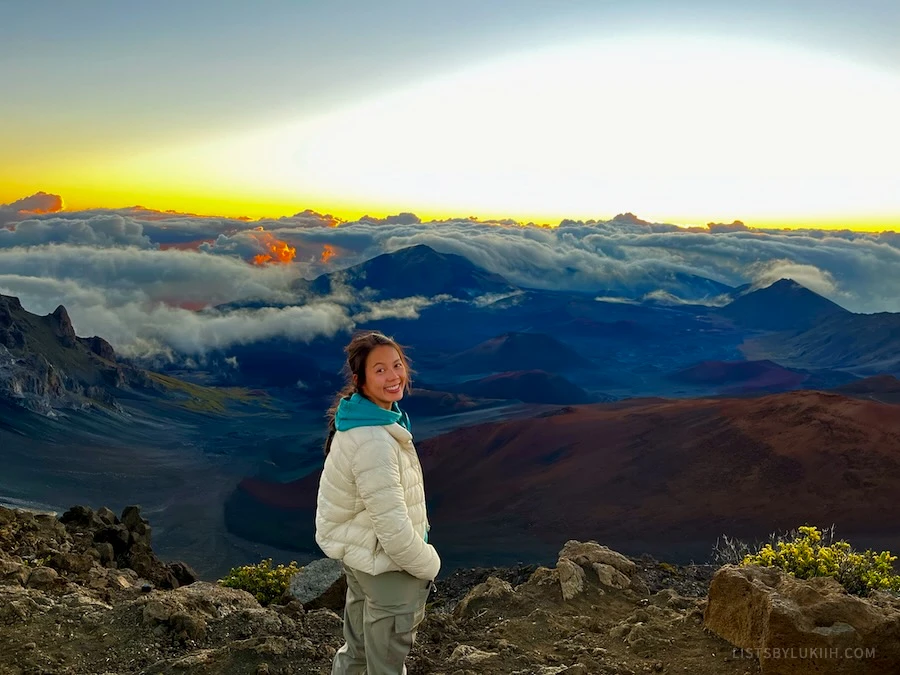
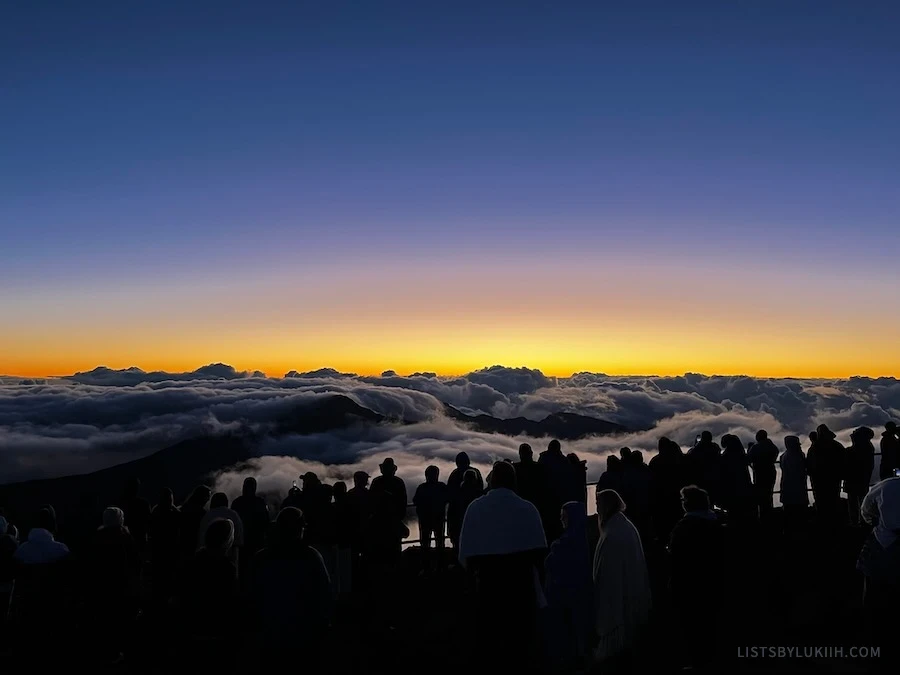
Day 4: Catch the Haleakalā Sunrise and Tour a Fruit Farm
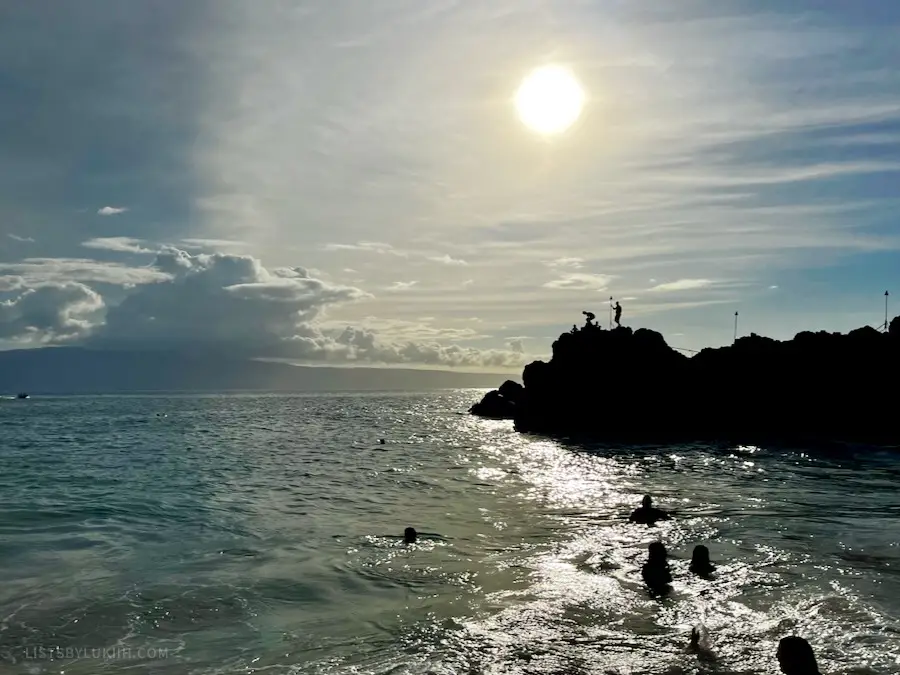
After exploring West Maui the previous day, start your fourth day in East Maui with the epic Haleakalā sunrise.
Stop #1: Haleakalā Sunrise
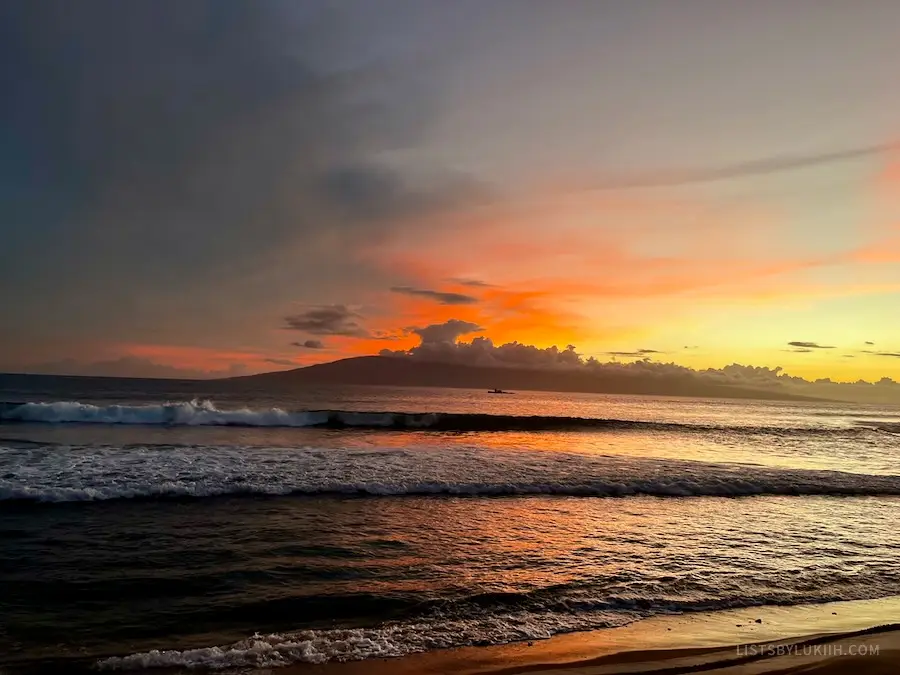
🤔 Why: The Haleakalā sunrise is one of Maui’s most famous activities and one of the best things to do. Get up very early in the morning (around 3 am) and drive to the dormant volcano’s summit for an epic sunrise.
You can also do the Haleakalā sunset, which is less popular, but can be equally beautiful.
🚗 Getting there: The Haleakalā sunrise takes place at the Haleakalā National Park. You need to get to the Haleakalā summit at least 15 minutes before sunrise.
⏰ Suggested duration: Depending on where you’re staying, it will likely take over an hour to get to the national park, so expect to wake up as early as 3 am and stay until at least 7 am for the Haleakalā sunrise.
💰 Expected cost: To enter Haleakalā National Park, you need to pay a $30 per vehicle entrance fee. Due to its popularity, the Haleakalā sunrise also requires an advanced $1 reservation.
A National Parks Pass will cover the entrance fee to Haleakalā. I had the annual $80 park pass, so my car didn’t have to pay the fee. All my travel expenses are shared in this Hawaii trip cost breakdown.
🍀 My take: The Haleakalā sunrise was the highlight of my trip. That said, it’s a bit of a hit or miss on whether you get a cloudy or clear view, which will impact your experience.
This Haleakalā sunrise and sunset guide has tips on getting sunrise reservations, the best place to stand, the best time to get there and what to wear (it can get very cold).
If you don’t want to deal with Haleakalā’s winding roads and long entrance wait early in the morning, you can also book a sunrise tour that takes care of the logistics and provides breakfast.
Stop #2 (Optional): Haleakalā National Park Hike
After the Haleakalā sunrise, you have the option to stay in the national park and hike one of its trails. If you’re not feeling it or are too tired from waking up early (like I was), skip to stop #3.
🤔 Why: While you’re already inside Haleakalā National Park, you should know that the park offers some challenging, but rewarding trails with gorgeous views around the volcano.

🥾 Trails: Depending on what kind of hike you want after your sunrise, you can either do one of the hard trails or mix a few of the easy ones.
- Sliding Sands is one of the most popular trails in the national park where you start at the rim of the Haleakalā crater and end at the bottom of it. It’s a hard 11-mile hike that my sister partially did and said was very rewarding.
- Halemau’u Haleakala Overlook Trail is a 7.6-mile stunning hike near the volcano crater that takes about four to five hours to complete. My sister also did part of this trail and also recommends it.
- Haleakalā National Park also has a few shorter trails that you can access from the summit. These trails include Hosmer Grove Campground, Leleiwi Overlook and Pa Ka’oao Trail.
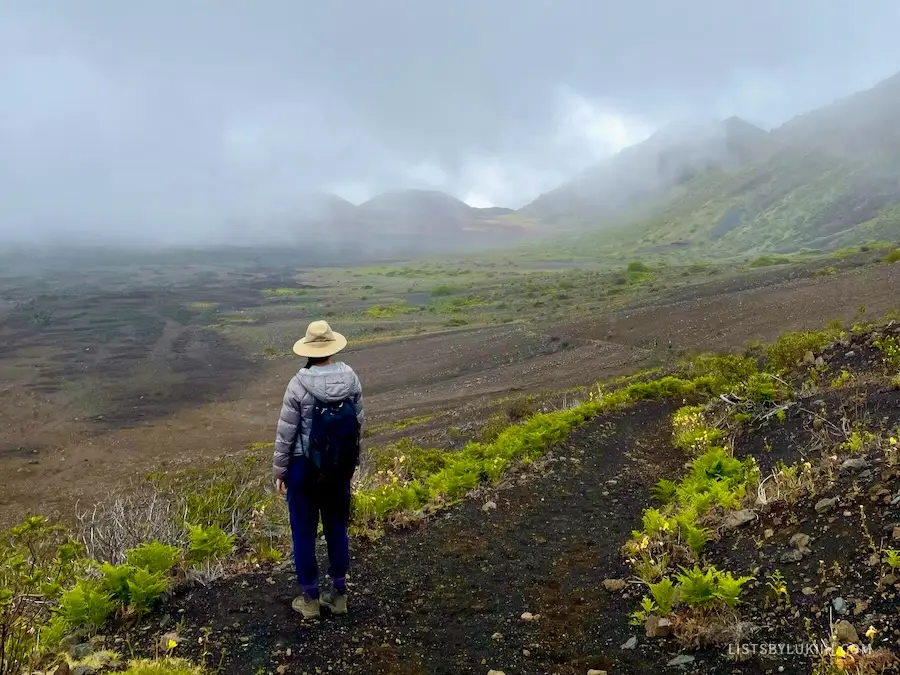
🍀 My take: I would have loved to hike and continue to enjoy the beautiful views at Haleakalā National Park, but because I got car sick from the winding roads, I instead took a breather at Grandma’s Coffee House, which serves delicious loco mocos and french toasts.
Stop #3: Go on a Fruit Farm Tour
After your Haleakalā sunrise or hike, tour one of Maui’s many fruit farms.
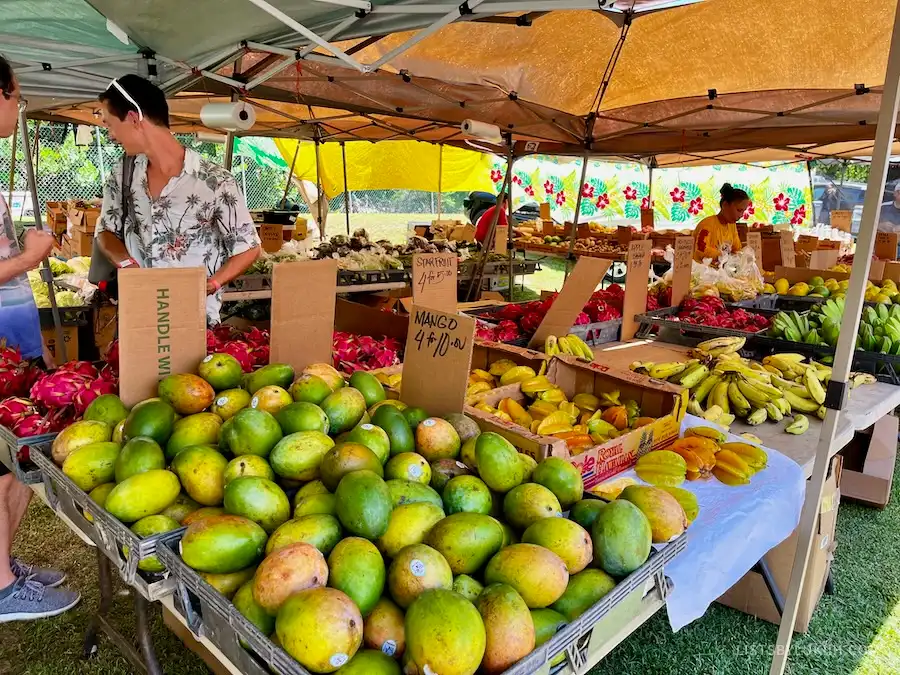
🤔 Why: Maui’s second biggest industry after tourism is agriculture, meaning that it produces an abundance of fresh food around the island. Fruit farm tours also include a large sampling of incredibly fresh fruits that you otherwise can’t get.
📍 Where: Maui has over 15 fruit farm tours, ranging from pineapple to dragon fruit to coconut farm tours. My sister did a highly-recommended pineapple tour while I did the Maui Dragon Fruit Farm tour.
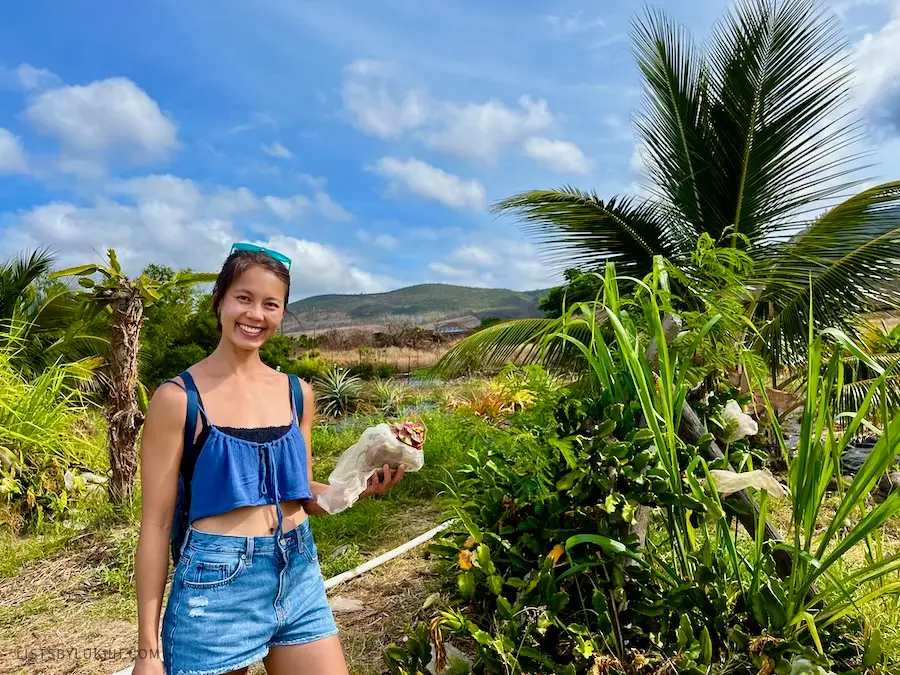
⏰ Duration: Fruit farm tours in Maui generally last between one and a half hours to three hours. Many of them offer morning and afternoon sessions and some even offer private tours at your preferred time.
💰 Expected cost: A fruit farm tour in Maui costs anywhere between $45 to $200 (I paid $45 for mine).
🍀 My take: The best dragon fruit I’ve ever had in my life was at the Maui dragon fruit farm tour — it was incredibly juicy and sweet. I also enjoyed learning agricultural facts about Maui.
Stop #4: Sunset at a Beach
If you did the optional hike in stop #2, you’ll likely be at the end of your day after the fruit farm tour. At this point, settle down on a beach somewhere to catch one of Maui’s gorgeous sunsets or head straight to dinner.
If you didn’t do the optional hike in stop #2, you likely have time to enjoy some beach time at a location near your fruit farm tour before dinnertime.
Day 5: Explore Central and South Maui
On your last day in Maui, explore the last two regions of the island, Central and South Maui. Start south and make your way north to Central Maui.
Stop #1 (First Option): Snorkel at Maluaka Beach
🤔 Why: Maluaka Beach, also known as Turtle Town, is an excellent snorkeling site in South Maui if you want to increase your chances of seeing a green sea turtle.
The best place to find sea turtles is towards the south side of the beach near the rocks.
🚙 Getting there: Maluaka Beach is one of the most southern beaches in South Maui.
A 5-minute drive further south will get you to Makena Beach, which is one of Maui’s biggest and most beautiful beaches with fine sand. You can easily stop here before or after Turtle Town.
🍀 My take: Enjoying the beautiful beaches of Maui is a great start to your last day on the island. If you love sea turtles or haven’t seen them yet, Maluaka Beach is a great spot, but otherwise, starting your day in Kihei is just as good (see the second option below).
Stop #1 (Second Option): Enjoy the beaches in Kihei
If you don’t want to drive as far south as Maluaka or Makena Beach, you can start your last day in Kihei instead.
🤔 Why: The town of Kihei features three beaches that are almost equally as beautiful as the ones further south in the Wailea area.
- Kamaole Beach I is the biggest and features fine white sand.
- Kamaole Beach II is similar to Beach I and has a big tide pool area.
- Kamaole Beach III has over 20 picnic tables and is a great place to watch crashing waves.
🚙 Getting there: Kamaole Beach I, Beach II and Beach III are all in Kihei in South Maui. The first two do not have a parking lot, but have ample street parking, while Beach III has a parking lot.
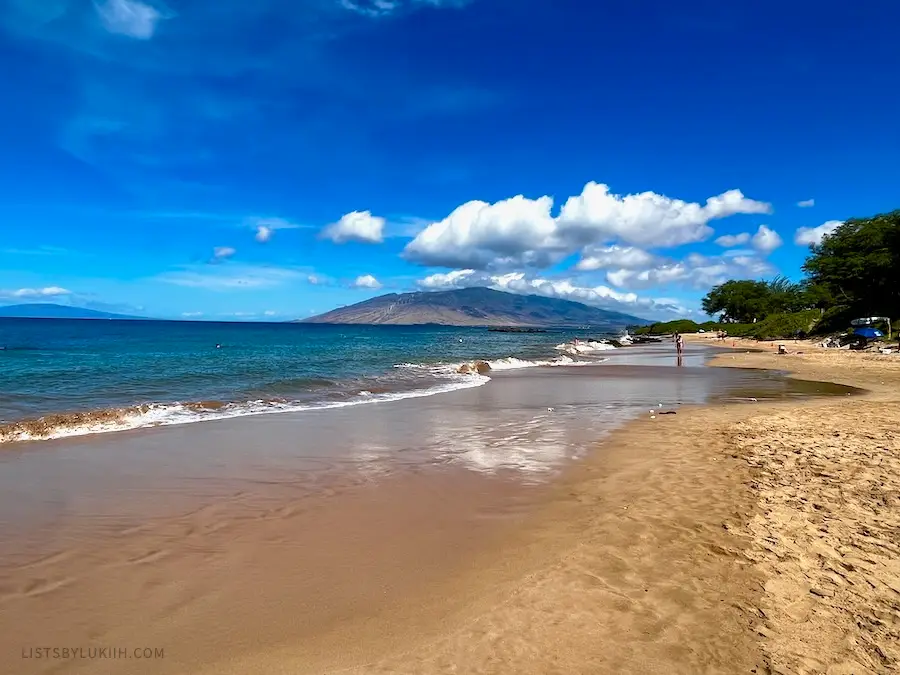
🍀 My take: The Kamaole beaches are quite beautiful, but I was more impressed by how many different beach areas there were featuring different vibes. I spent a lot of time exploring the tide pools on the south side of Kamaole Beach II; they were challenging and fun to cross.
After enjoying the Kamaole beaches, consider making a stop at Maui Ono Donuts for delicious donuts, Yee’s Orchard & Fruit Stand for fresh fruits or Foodland Kihei for affordable, fresh poke.

Stop #2: Explore Central Maui
After lunch, enjoy more beach time in South Maui or start heading to Central Maui.
🤔 Why: Central Maui has a residential community mixed with a beautiful park and well-known shopping centers.
📍 Where: On your last day, you have several options on where to go in Central Maui depending on your mood and what you didn’t get enough of in Maui. Your options include:
- Paia. Paia is a small town where the main street is lined with brick-and-mortar shops. Stop here if you want another town to walk around after spending time in Lahaina. My stop here was enjoyable, but the town is small enough that I don’t consider it a must-visit if it’s too far of a drive.
- Iao Valley Start Monument. Located inside Iao Valley State Park, the monument is a beautiful site in Central Maui. You can enjoy views, hikes or go through the botanical garden if you didn’t get enough of those sites during your Road to Hana road trip.
- Market Street. Market Street in Wailuku is a unique shopping area where you can stroll through boutiques, coffee shops, restaurants and art galleries. Come here if you’re looking to do more shopping.
- Maui Swap Meet. Maui Swap Meet is an open-air flea market where vendors set up every Saturday to sell souvenirs and fresh fruits and flowers. They close at 1 pm, but food starts disappearing before noon, so you have to get there early. I bought a few souvenirs here and enjoyed walking around, but don’t consider it a must-see if you’re tight on time.
🍀 My take: Truthfully, Central Maui was my least favorite region in Maui, but it’s still distinct enough of an area to visit if you want to see more of Maui. Otherwise, stick to enjoying the beaches in South Maui on your last day.
Accommodations in Maui
Pros and Cons of Staying at Each Maui Region
As mentioned above, Maui has five regions and staying in each one has its pros and cons.
Staying in West Maui
- Pros: West Maui is one of the more popular tourist areas and as seen in the itinerary above on day 3, it offers everything from a lively town to great snorkeling sites.
- Cons: West Maui is more crowded and a far drive from two of Maui’s best attractions, Road to Hana and Haleakalā Summit.
Staying in South Maui
- Pros: As seen on day 5 of the itinerary, South Maui offers many stunning beaches and is within driving distance of all other regions (but still far from Haleakalā summit).
- Cons: However, this region doesn’t have much “culture” and you get the sense that it’s catered toward tourists.
Staying in Central Maui
- Pros: Central Maui will offer you the most local experience in Maui and as seen on day 5 of the itinerary, you’ll be close to a wide variety of things to do. It’s also the best in terms of driving distance from all the other regions.
- Cons: Central Maui doesn’t have the most well-known or best beaches and it’s also not particularly near any of Maui’s biggest attractions.
Staying in East Maui
- Pros: East Maui is basically the Road to Hana so it’s one of the best places to stay for natural beauty.
- Cons: There’s not much else to do in East Maui except for the Road to Hana.
Staying in Upcountry Maui
- Pros: Upcountry Maui is the perfect place for your visits to Haleakalā National Park.
- Cons: Like East Maui, there’s not much else to do there except for the national park.
Where I Stayed in Maui
During my eight-day trip to Maui, I stayed at the following two hotels:
🏠 Hotel #1: I stayed at Castle Kamaole Sands in South Maui and paid $106 per person per night.
- Pros: The hotel is located within walking distance of some of Maui’s most beautiful beaches. The price is also reasonable for the kinds of rooms and amenities you get in Maui.
- Cons: There aren’t many amazing food options around this location and you can’t really walk to anything besides the beach.
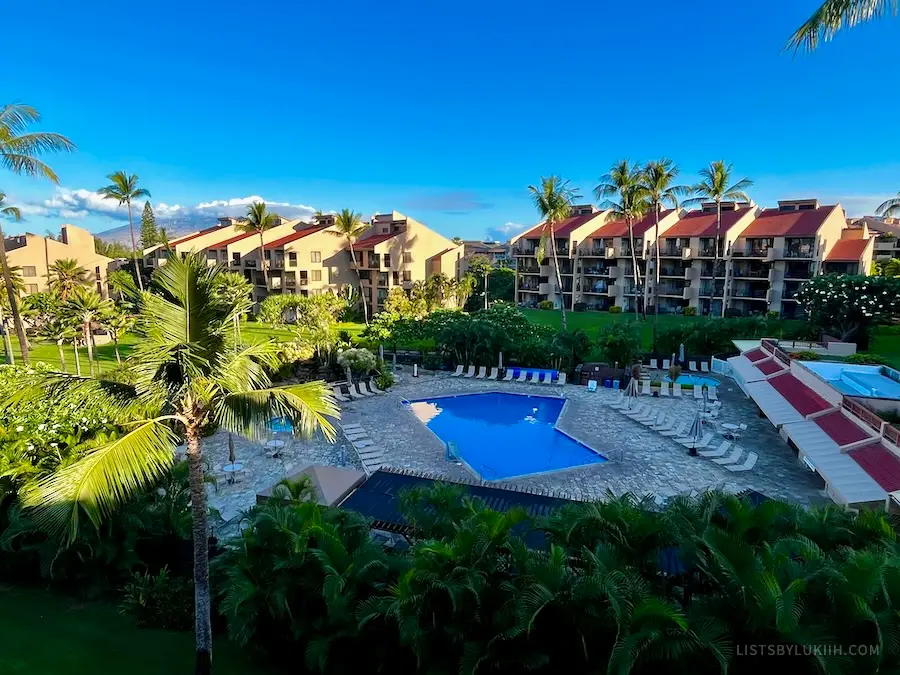
🏠 Hotel #2: I also stayed at Hyatt Regency Maui Resort in West Maui and paid $193 per person per night.
- Pros: This Hyatt resort is a nice resort with beautiful surroundings and great amenities. Staying in West Maui also aligned really well with my planned activities in that region.
- Cons: Like many other resorts in Maui, you can feel very “stuck” in the resort and not be as motivated to go out and explore the island.

Maui Trip Planner
To make your travel planning easier, download the trip planner below and use it as a starting point. The planner has country-specific travel information, an itinerary, a packing list, and a map with key places pinned.
The trip planner is built on Notion, which I use for all my travel planning (I genuinely love this tool). If you don’t have Notion, creating an account is free.
Hawaii Travel Guides
- 🏝️ Maui Amazing 5-Day Itinerary + Great Things To Do
- 🌋 Big Island: 3-4 Day Itinerary + 10 Great Things To Do
- 💰 My 2024 Hawaii Trip Cost: A Budget Breakdown
- ☀️ Haleakalā Sunrise: My Honest Review & Tips
- 🤿 Captain Cook Hike to Kealakekua Bay: My Honest Review & Tips
- 🚗 Road to Hana: My Honest Review & Tips
🧋 Support Lukiih
Lists by Lukiih is a humble website that I fund with my own savings. If you find my tips helpful, I appreciate you saying thanks with a bubble tea!