The Road to Hana is a 64-mile coastal road trip and one of Maui’s most popular activities. Using a clear rating system, I share my honest review of the experience, along with firsthand tips.
Lists By Lukiih is readers-supported. When you buy with my affiliate link, I may earn a small commission. Thanks!
🍀 Lukiih’s Verdict
I recommend the Road to Hana when visiting Maui if you have sufficient time and are willing to take a winding road trip.
- It’s a one- to two-day road trip with over 40 stops, including hikes, waterfalls, and beaches.
- The experience can be affordable as most attractions have no entry or parking fee. You’ll mainly need to pay for gas and food.
- Moderate preparation is required, as you need to pack accordingly, drive for several hours, and rent a car.

🏆 Where Does It Rank?
The Road to Hana ranks as the #5 experience I had in Hawaii. Here’s how it compares to other things I did on my trip:
My Maui and Big Island itineraries feature the above experiences.
✈️ About My Trip
For context on my review, here’s what to know about my trip:
- I finance my trips and don’t receive sponsorship; this review reflects my honest opinions.
- This post has updated 2024 information, but I did the Road to Hana in 2022.
- My Hawaii trip was in September when it was less crowded and expensive.
- Traveling the Road to Hana is a rare experience. I estimate that fewer than 20 comparable road trips exist worldwide. It’s an iconic drive that takes visitors through lush rainforests, stunning waterfalls, and rugged coastlines.
- The drive itself is adventurous, with over 600 curves, 50 bridges, and one-lane portions with some blind spots.
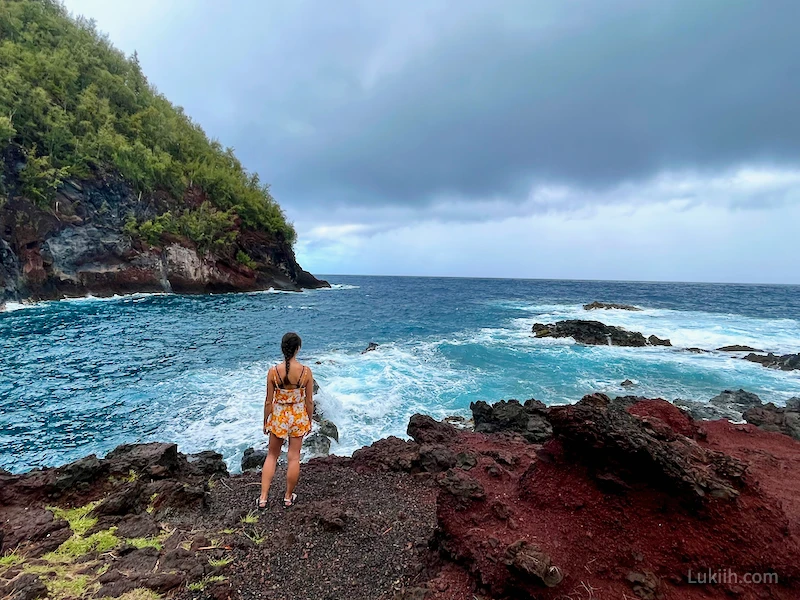
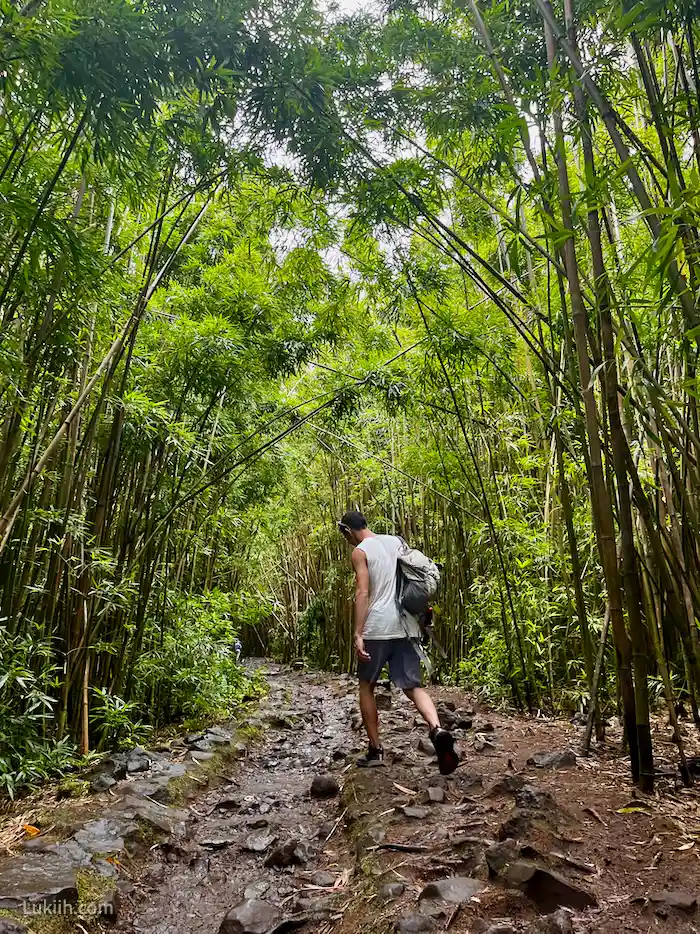
- The road features some truly unique attractions. The Bamboo Forest hike features a big bamboo garden that seems rare outside of Japan. Kaihalulu Beach is also memorable; I’ve never seen another beach with sand as red.
- Other coastal road trips with natural sceneries exist worldwide, including Australia’s Great Ocean Road, South Africa’s Garden Route, and New Zealand’s Haast Pass.
- Many of the stops along the road aren’t epic or that memorable on their own. The road trip is more memorable for its collective stops.
- The high number of varied attractions makes the road trip fun and exciting.
- The drive is scenic for large portions of the road.
- Driving the entire Road to Hana in a day can feel rushed, and you’ll have to prioritize which stops you want to see.
- The road conditions are challenging for some. I was nervous during some portions, especially when it started to get dark.
- None of the hikes or stops along the road are very physically challenging.
See below for the different ways to split a Road to Hana itinerary.
The cost of doing the Road to Hana is about $50 per person per day. Your budget depends on several things, such as which attractions you visit, how many meals you eat on the road, and how many days you spend there.
I spent $38 over two days and was able to split costs with another person. Here’s how the costs break down (I last checked prices in May 2024):
- 🚙 Parking Fees – Most stops do not have parking fees. The most popular attractions to have them is Pīpīwai Trail ($30) and Waiʻānapanapa State Park ($10). I paid $5 to park at Twins Fall.
A National Parks Pass will cover the parking fee for some attractions, which saved me some money.
- 🎟️ Entry Fee – Most stops do not have entry fees. The most popular attraction to have an entry fee is Waiʻānapanapa State Park ($5 per person), which has the famous black sand beach.
- 🍗 Food – You’ll pay for at least one meal. Unless you pack food, you’ll likely spend at least $20 on lunch. I paid $18 for lunch at Huli Huli Chicken.
- ⛽️ Gas – Gas costs about $10 to $15 for the entire road. I spent $15 on gas.
If you prefer to not drive through the road conditions, consider booking a full-day Road to Hana tour.
See my Hawaii trip expenses.
- You’ll need to be comfortable driving through the road conditions. Most hikes are easy-to-moderate trails less than four miles long, so you don’t need a lot of endurance. Pīpīwai Trail is the most challenging trail among the more popular hikes, and it’s only four miles long.
- The Road to Hana is a 64-mile road trip that starts on Route 36. The only ways to travel the road are by renting a car or taking a tour. The road trip typically takes one to two days, depending on how you want to break it up.
- The only attraction that requires reservations is Waiʻānapanapa State Park, which you should book a month in advance. Make sure to book your rental car ahead. Some stops allow you to hike, swim, and enjoy the beach, so you’ll want to dress and pack accordingly.
How To Guide & Tips
Interested in driving the Road to Hana after reading my review? Below is a practical how-to guide and firsthand tips.
Where To Start
The Road to Hana typically starts here on Route 36, also called Hana Highway. It typically ends in Kaupo district on the south side of Haleakalā. You can start and end in either direction.
I suggest being on the road between 8 am and 9 am to avoid driving in the dark. If you split the trip between two days like I did, you can start later (I started at 2 pm and 8 am on the first and second days, respectively).
How To Split the Itinerary
The Road to Hana takes at least seven hours from start to end. You can add two to four more hours, depending on the number of stops you make. I was on the road for 13 total over two days. There are several ways to split the itinerary:
- Classic 1-day – The classic trip is driven in one day from north to south (i.e., from Kahului to Kaupo). Many visitors say this can feel rushed.
- Overnight 2-day – You can split the drive over two days and stay overnight somewhere along the road. This is the best option if you want to visit more than seven stops without feeling rushed.
- No overnight 2-day – You can also split the drive over two days where you focus on the north or south side each day. This is the route I did, which entails a lot more driving.
- Halfway – If you want to do it within a day but don’t want to feel rushed, you can drive halfway out and back. You’ll have to pick between visiting just the north or south side. The north side, from Kahului to Hana, is the more iconic drive.
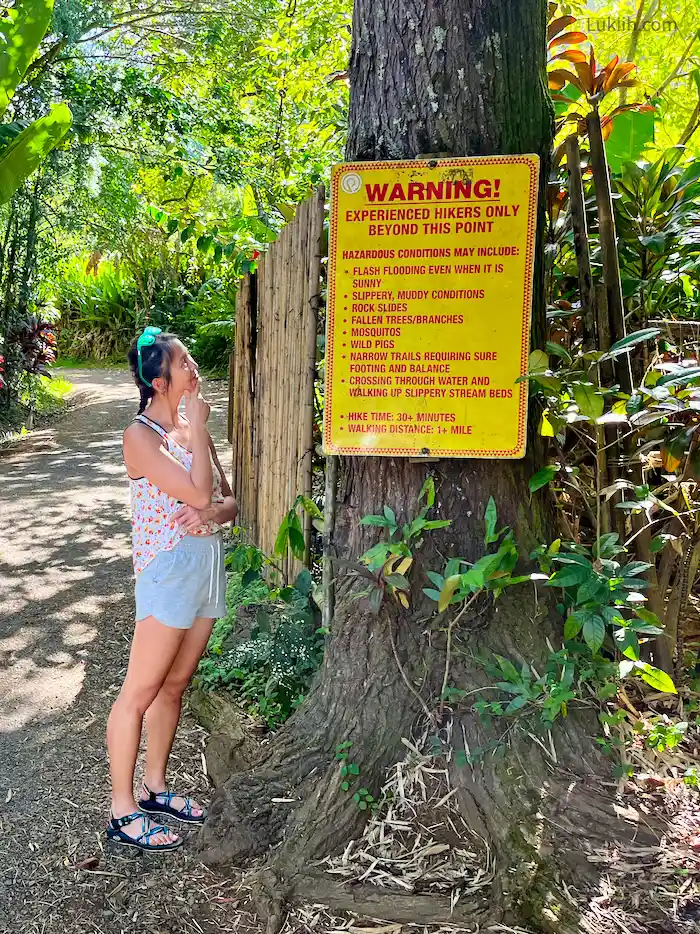
What Are Road Conditions Like
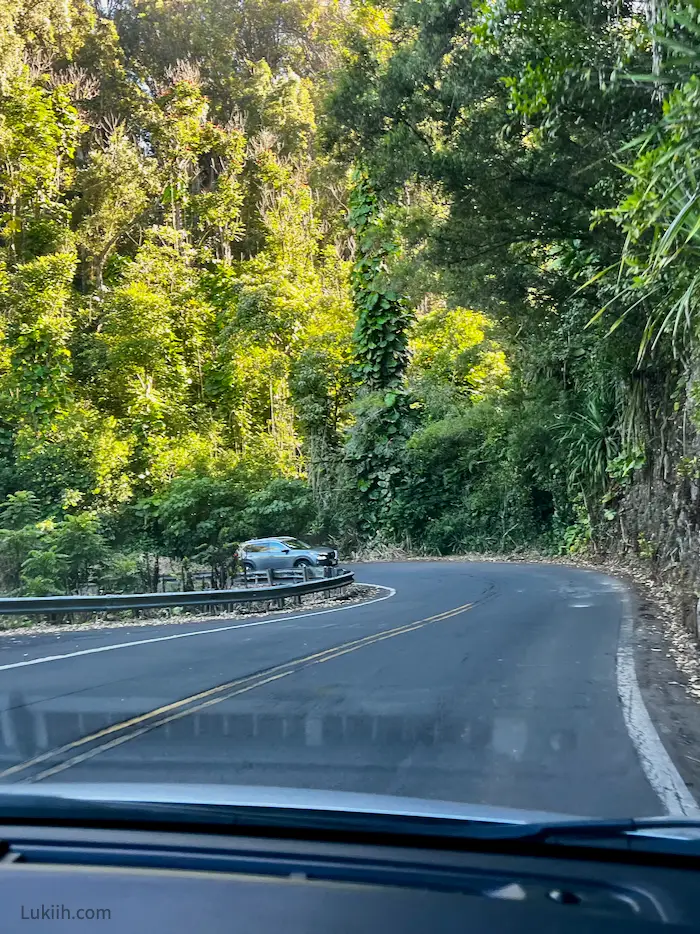
Almost all visitors agree that the Road to Hana is not a comfortable, casual drive. Having driven it, my assessment is that it’s not dangerous, but you should be careful, follow driving precautions, and have a confident driver.
- Narrow lanes – For most of the journey, it’s a two-way road that barely fits two vehicles. A passing car scraped one of my friend’s rental cars on a narrow part.
- Blind turns – This is the road’s most dangerous and scariest part. There are two places that are completely blind and only wide enough to fit one vehicle at a time.
- Winding roads – The journey has over 600 turns and corners.
- Aggressive local drivers – Locals live along the road and are used to driving it, so they are known to aggressively pass tourists.
- No street lights – This becomes a problem once it starts getting dark.
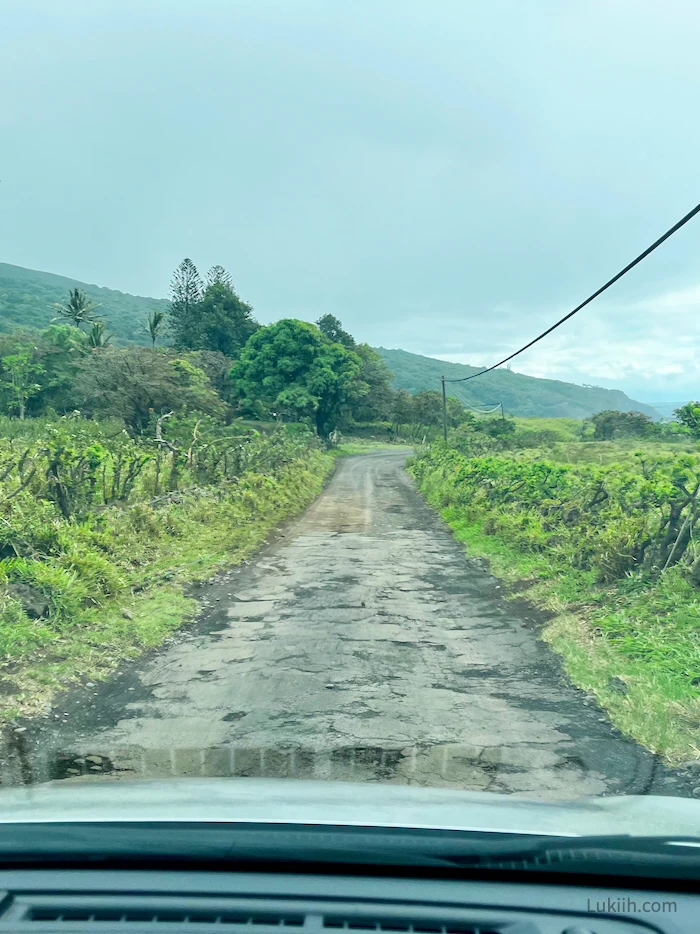
- Backroads – Some parts of the southern section (also known as the “backroads”) are not entirely paved, and some areas are not well-maintained.
- Weather – Check weather conditions before departing, as that can increase the risk of falling rocks and landslides.
Which Rental Car
Given the road conditions outlined above, here are some car rental tips when driving the Road to Hana:
- 🛞 You don’t need all-wheel drive (AWD) – Most of the road is paved, and only a few stops require brief off-roading. If it’s raining or you’ll feel more confident in one, rent an AWD.
- 💥 Many rental companies do not cover accidents in the backroads – Check your car rental agreement for details on whether they cover unmaintained southern areas.
- 🚙 A compact car is good for narrow roads – A compact car is not a must, but if you’re not confident in narrow roads, a smaller car feels more comfortable.
- 🚗 The driver is more important than the car – The driver’s confidence and ability to drive cautiously are more critical in handling the road than the car you rent.
I rented and drove a Toyota Corolla for my road trip. It did the job, and I didn’t overthink it.
Attractions & Stops
This Road to Hana has 40 stops:
My favorite attractions and stops were:
🌊 Kaihalulu Beach (Red Sand Beach)
Kaihalulu Beach is a stunning, hidden cove where the red sand contrasts against the turquoise ocean. It’s one of the more challenging places to get to, which adds to the adventure.

Locals do not like tourists visiting Kaihalulu Beach for two reasons: (1) it’s considered a sacred beach, and (2) tourists frequently get injured visiting it. Be respectful (don’t take anything except photos) and be careful.
💰 Fee: Free; no parking or entry fee.
🚗 Getting There: Kaihalulu Beach is in Hana. Park along Uakea Road (I parked near the Hana School). Walk all south to the start of the trail for a narrow, short, 0.2-mile-long walk to the beach.
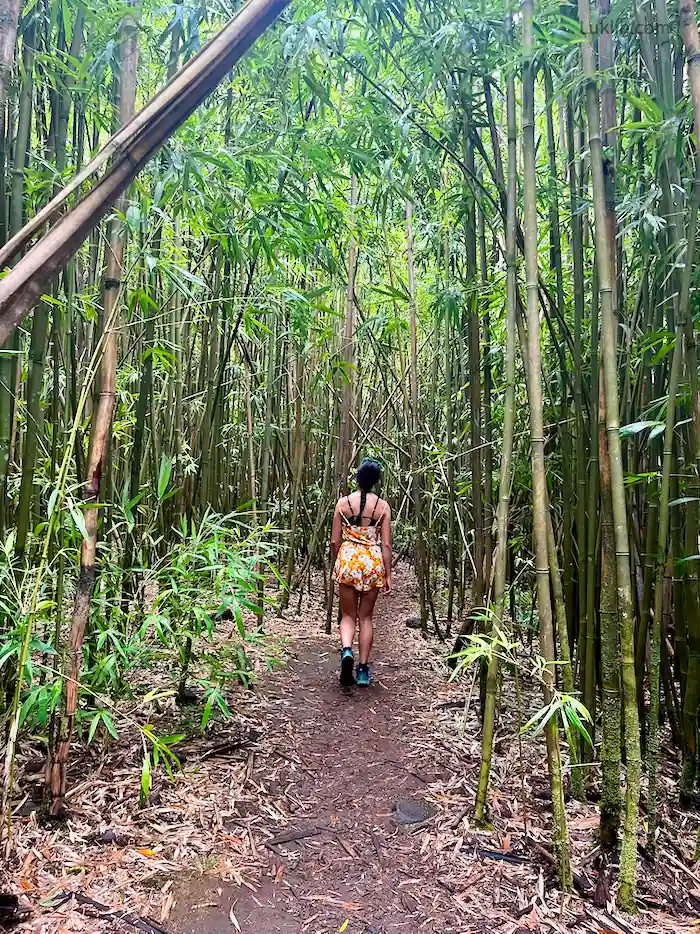
🎍 Pīpīwai Trail (Bamboo Forest)
The Pīpīwai Trail is a 3.8-mile out-and-back, easy-to-moderate trail through a bamboo forest to Waimoku Falls, a waterfall that can be viewed from afar. Most of the trail is flat but gets muddy and slippery when it rains.
💰 Fee: The parking at Kīpahulu Visitor Center costs $30 per vehicle.
A National Parks Pass will cover the parking fee.
🚗 Getting There: The Pīpīwai Trail is one of the first stops starting from the south. The trailhead is near the visitor center.
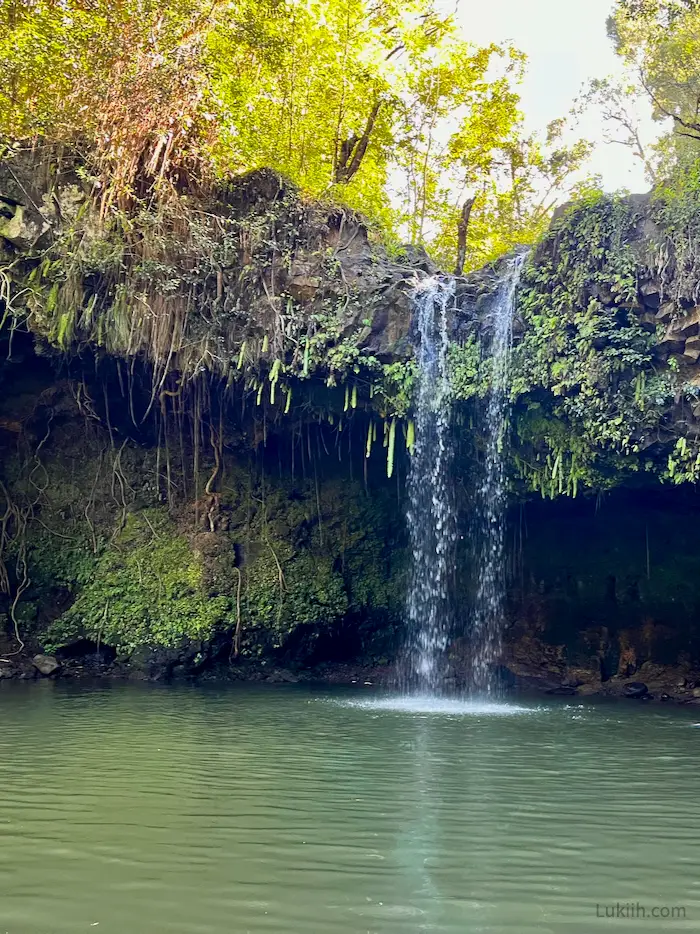
💧 Twin Falls Hike
Twin Falls is a short, easy one-mile hike that passes through a swimming hole where you can jump from heights 10 feet and above. At the end, there’s a short waterfall that you can swim in.
💰 Fee: Parking is $10 per vehicle.
The trail closes at 5 pm, but the parking lot closes at 3:30 pm.
🚗 Getting There: Twin Falls is one of the first stops starting from the north. The parking lot is right off the Hana Highway, and there’s a fruit stand near the entrance.
Make sure to bring bug spray (I like this bug repellent lotion), as there are a lot of bugs on the trail here.
🌟 Other Attractions
Here are the other stops I made on the Road to Hana and my quick tips on them:
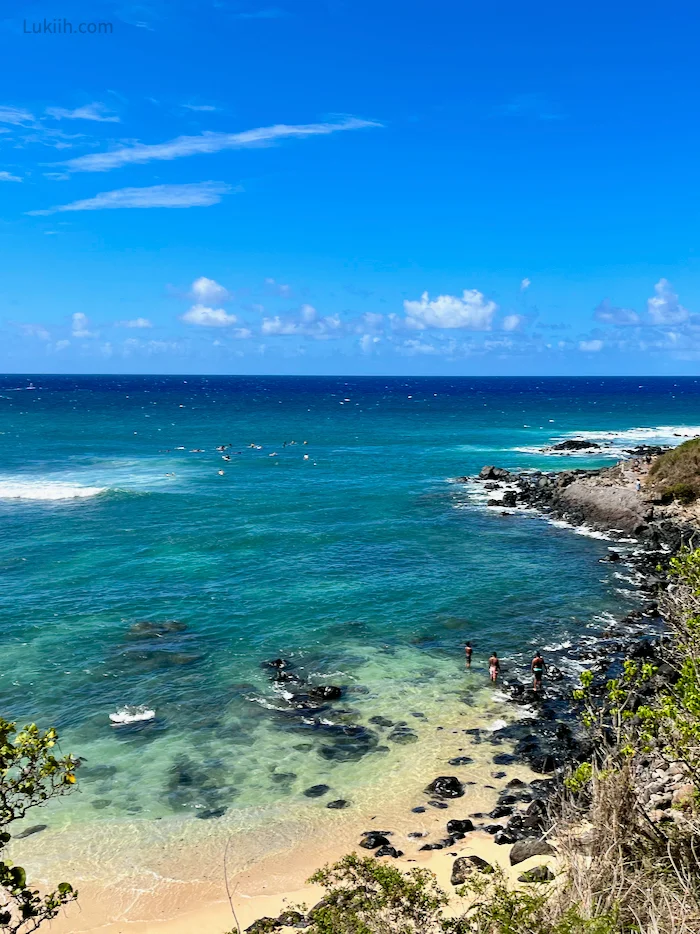
- Ho’okipa Beach and Lookout – a nice, brief beach stop to watch surfers and windsurfers. The waves are a bit unpredictable, but you can sometimes spot sea turtles. There’s no entrance or parking fee, but there are bathrooms. The parking lot can get crowded, and the cell signal is weak here.
- Honomanū Bay – a “hidden” black sand beach (I had the beach all to myself). You have to go off-roading for a few minutes to get to the entrance. There’s no entrance or parking fee.
- ʻOheʻo Gulch (aka Seven Sacred Pools) – an area home to several waterfalls. It’s been closed for swimming since 2017, so visitors can just look at it from afar, which I found underwhelming.
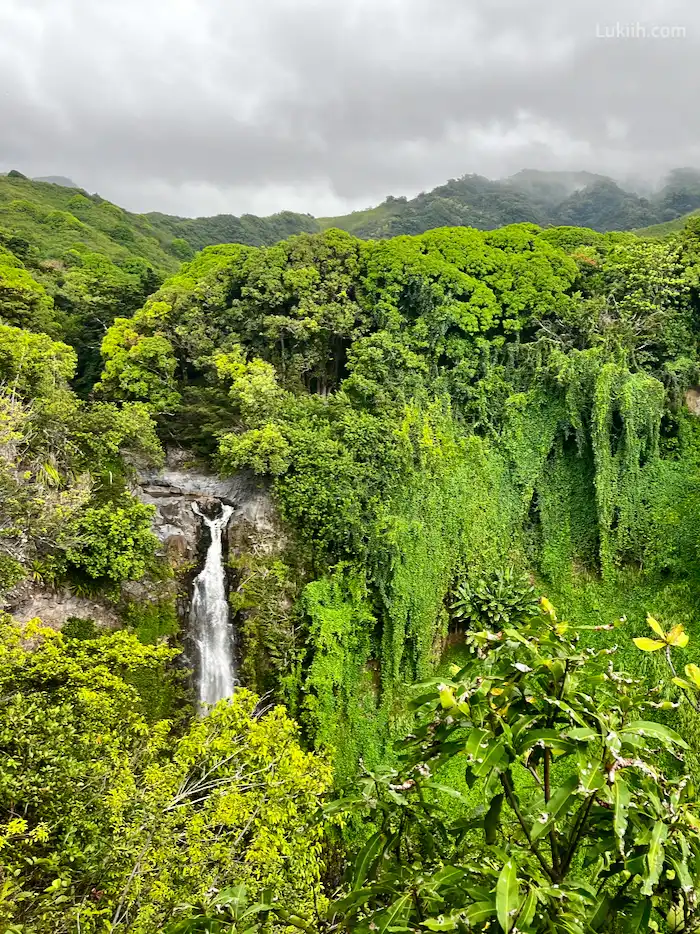
- Wailua Falls – an iconic waterfall that is viewable from the road. Parking is limited, and it was overcrowded when I went, so I just drove by it and looked at it from afar.
- Paia – a small community near the start on the north side where you can get souvenirs and a poké or acai bowl. You can walk the entire street in 15 minutes if you don’t stop. Parking is limited.

🐠 Food Stops
I made two food stops on the Road to Hana, and here are my quick tips on them:
- Huli Huli Chicken – a chicken food vendor near the start if you’re coming from the north side. It’s cash-only, and at $18 per entree, it was decently good but not a must-have.

- Halfway to Hana – a banana bread and fruit vendor stop. Their banana bread was good but not outstanding. Aunty Sandy’s Banana Bread is the famous one with raving reviews, but I couldn’t get there before they closed at 2:30 pm.
My pro tip is to pack food from the Hawaiian grocery store, Foodland (they have amazing fresh poké), in advance and bring it to eat at picnic stops.
What To Pack
Whether you’re hiking, jumping into a swimming hole, enjoying the beach, or mostly checking out some great views, here’s what to pack on the Road to Hana:
- Swimsuit – The road trip features over a dozen beaches, swimming holes, and waterfalls.
- Quick-dry towel – If you’re going to go swimming, bring a quick-dry towel for easy drying, as you’ll be on the road for hours.
- Reef-safe sunblock – Help protect the corals and bring reef-safe sunscreen.
- Bug repellent – There are some stops where you’ll be walking through a rainforest. I like this bug repellent lotion, which I think works better than the spray alternative.
- Sunglasses – Bring eye protection, as many parts of the road are not shaded. I brought my athletic sunglasses.
- Hiking shoes or athletic shoes – You’ll experience paved paths, dirt roads, and rocky trails, so bring shoes you’re comfortable using on different terrains.
- Sandals – Sometimes you might want to switch to sandals (e.g., if you’re going into the ocean). I wore my Chacos most of the time.
- Loose, comfortable clothes – Potential activities include hiking and swimming, so wear something comfortable for a hot and humid climate.
- Raincoat or rain poncho – Bring a light raincoat, just in case. I had to wear mine during an abrupt but brief downpour.
- Snacks and water – Many parts of the road trip are uninhabited without food stalls, so bring snacks and water. I brought my reusable water bottle, which kept my water cold for hours.
- Cash – Some stops require cash for food or parking, so carry at least $20 to $40 per person.
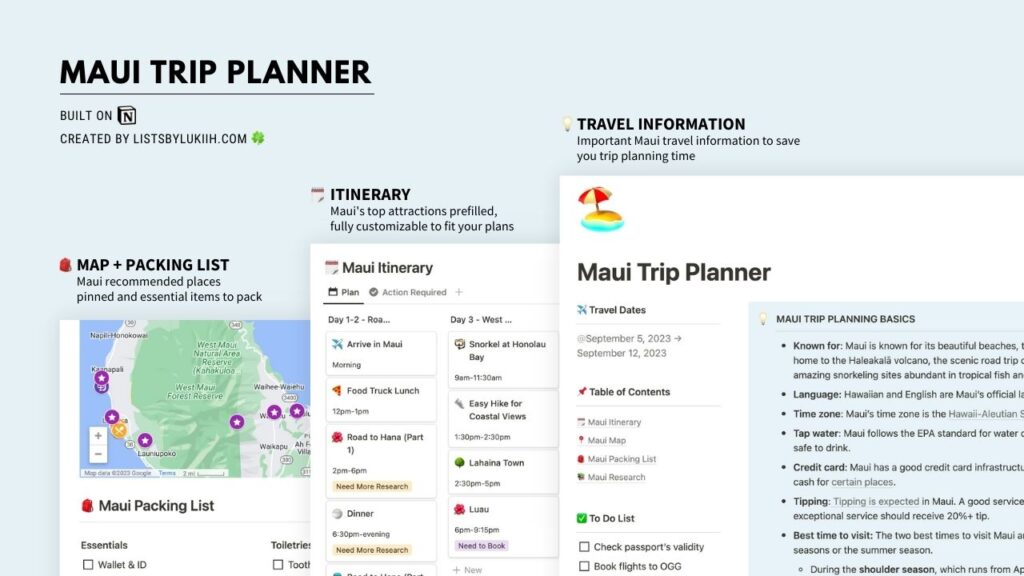
Maui Trip Planner 2024
To make your travel preparation easier, download the trip planner below. It has destination-specific travel information, itinerary, map, and packing list.
My trip planners are built on Notion, which I use for all my travel planning. I genuinely love this tool and creating an account is free.
Hawaii Travel Guides
- 🏝️ Maui Amazing 5-Day Itinerary + Great Things To Do
- 🌋 Big Island: 3-4 Day Itinerary + 10 Great Things To Do
- 💰 My 2024 Hawaii Trip Cost: A Budget Breakdown
- ☀️ Haleakalā Sunrise: My Honest Review & Tips
- 🤿 Captain Cook Hike to Kealakekua Bay: My Honest Review & Tips
- 🚗 Road to Hana: My Honest Review & Tips
🧋 Support Lukiih
Lists by Lukiih is a humble website that I fund with my own savings. If you find my tips helpful, I appreciate you saying thanks with a bubble tea!