Every year, around 300,000 people hike Mt. Fuji, Japan’s highest mountain and one of its most iconic symbols. Using a clear travel rating system, I share what the hike is like—plus tips from my own trip.
Lists By Lukiih is readers-supported. When you buy with my affiliate link, I may earn a small commission. Thanks!
🍀 Lukiih’s Verdict
Hiking Mt. Fuji in Japan is an unforgettable travel highlight. It was my trip’s most rewarding experience.
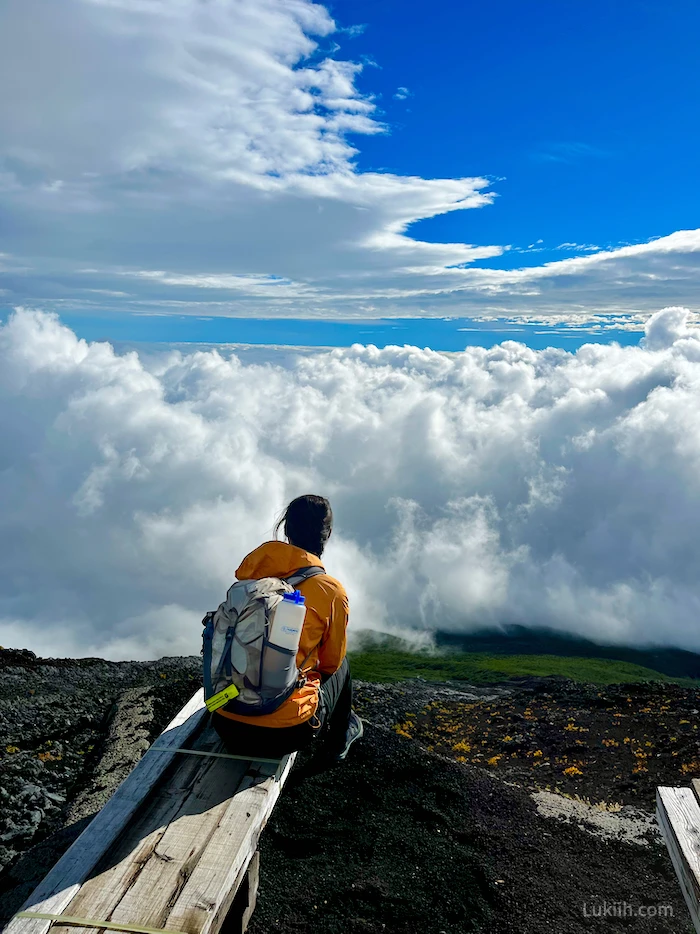
- The hike is a bucket-list item for good reason: the summit offers a spectacular sunrise with awe-inspiring views on the world’s most famous volcano. There are four trails, and hiking one of the less popular ones, like I did, is remarkably serene.
- The hike is affordable, even after accounting for accommodation, transportation, food, and entrance fee/conservation donation.
- Extensive preparation is required, as the hike demands physical fitness, careful packing, and advanced reservations. With planning and training, many hikers can reach the summit.
🇯🇵 Planning a Trip to Japan: 12 Practical Things To Know
🏆 Where Does It Rank?
Hiking Mt. Fuji ranks as the #2 experience I had in Japan. Here’s how it compares to other things I did on my trip:
⛩️ 10 Epic Days in Japan: A Unique & Active Itinerary
✈️ About My Trip
For context on my review, here’s what to know about my trip:
- I finance my trips and don’t receive sponsorship; this review reflects my honest opinions.
- I hiked Mt. Fuji in 2023, but this post has updated 2025 information.
- My Japan trip was in September when it was less crowded and expensive.
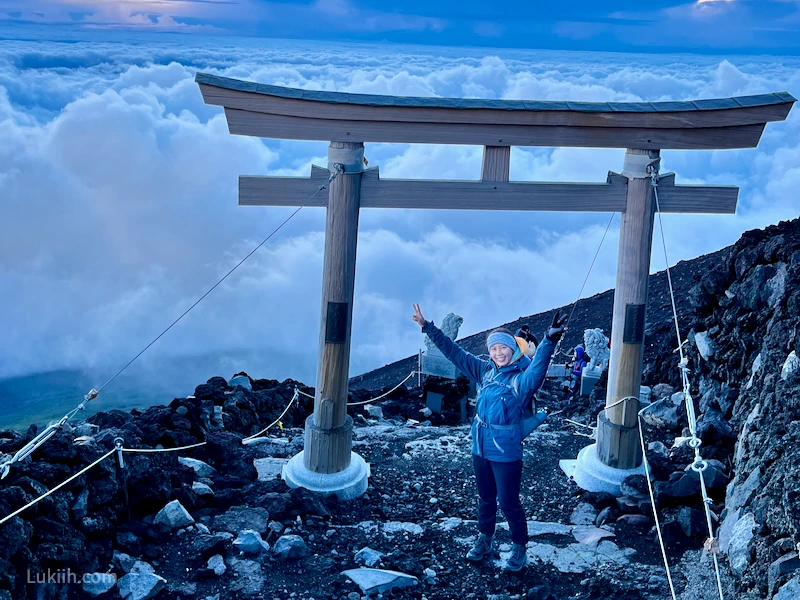
- Climbing Mt. Fuji is a rare experience. It’s a sacred mountain, a UNESCO World Heritage Site, and one of the world’s most famous volcanoes. The overnight climb, cozy mountain hut experience, and torii gates near the summit all make it an unreplicable experience elsewhere.
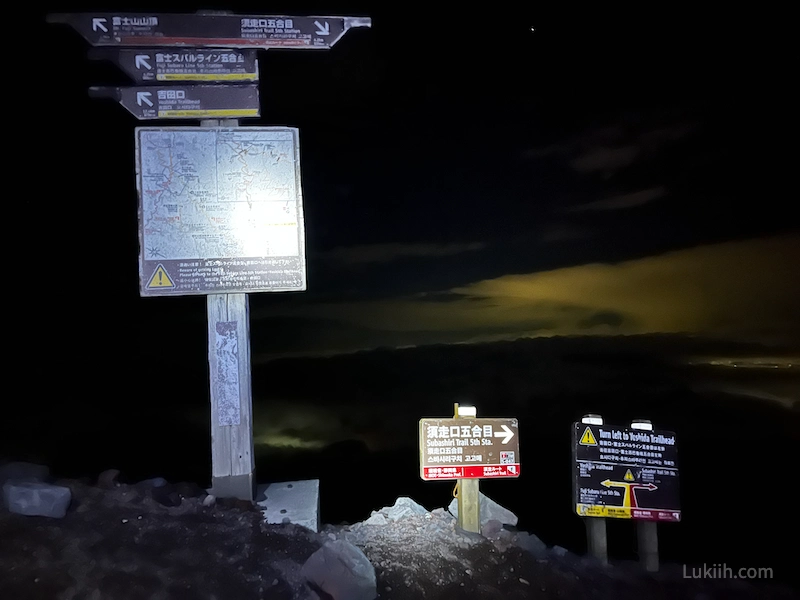
- The hike is extremely memorable as the feeling of accomplishment upon reaching the summit is unforgettable. The dark hike before sunrise is also epic; you might see lightning light up the sky from afar.
Mt. Fuji is only open for hiking for two months every year.
- A few other popular volcano sunrise hikes exist around the world, including Indonesia’s Mount Batur, Guatemala’s Acatenango Volcano, and Italy’s Mt. Etna.
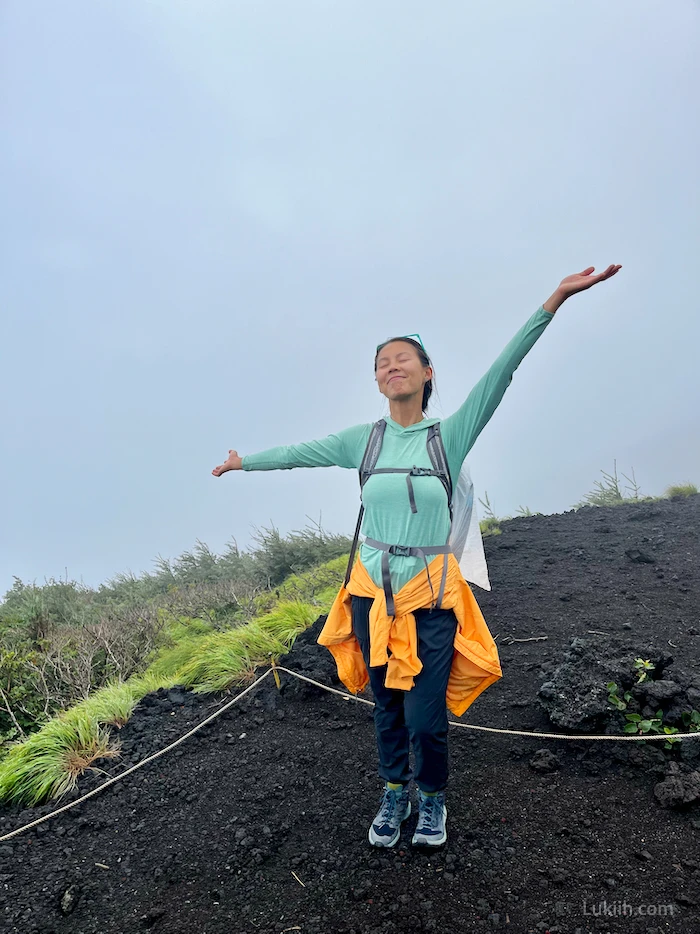
- If you get a cloudy and rainy day like I did, you’ll miss out on the spectacular views that make the hike even more remarkable.
Like most hikes at high altitudes, the weather may not hold up.
- There are four trails on Mt. Fuji, and I chose the less-crowded Subashiri Trail, which made the hike blissful.
- I initially worried about the dorm-style mountain huts, but they were cozy, clean, and pleasant.
- The hike is steep and usually takes two days, so it’s physically challenging and, therefore, rewarding.
- It’s a strenuous and steep hike, no matter which route you take, so it’s a type 2 fun activity that you may not enjoy in the moment.
- Weather conditions can change rapidly. It’s a lot less pleasant if you’re unlucky and get fog and rain like I did. The summit was colder and more windy than I expected, so I couldn’t stay and enjoy the peak for long.
- The most popular route is exceptionally crowded, so that’s something to consider when choosing the trails.
The Japanese government had to put restrictions on the Yoshida Trail starting in 2024 as issues like litter, traffic, and trail damage worsened.
Hiking Mt. Fuji over two days costs between $100 and $150. I spent $139. Here’s how the costs break down (I last checked prices in January 2025):
- 🏠 Mountain hut: $40-$65/night – This depends on the hut you book. I paid $64.
- 🚌 Bus: $10-$15 total – This depends on the route you take. I paid $40 for both the bus and train.
- 🚌 Train from Tokyo: $10 total – This assumes you’re taking a standard train. I paid $40 for both the bus and train.
- 🌋 Entrance fee: $7-$13 total – Most routes have an optional conservation fee, and the most popular route has a required entrance fee. I paid $7 for the Subashiri Trail.
- 🍙 Food: $25 total – Some meals are included in the mountain hut. I spent $23 on snacks and extra food at the hut.
- 🚽 Miscellaneous: $5-$10 total – Bathrooms on the mountain have a small fee. There are a few shops at the summit. I spent $5 between bathrooms and souvenirs.
If you’re a less experienced hiker and prefer a hassle-free experience that requires less preparation, consider hiring a Mt. Fuji hiking guide.
💰 My Japan Trip Cost: Budget Breakdown (2025)
- You need some nontrivial skills and fitness to summit Mt. Fuji.
- Know how to adjust to high altitudes and prepare for unpredictable weather. The trails are well marked, so you don’t need much navigational skills.
- You’ll need endurance to hike steep inclines for 8-10 hours over two days.
- The four Mt. Fuji trailheads are located in different areas of the mountain.
- All trails are accessible by public transportation and are 2-3 hours away from Tokyo. You typically take a 1-2 hour train to a town near the volcano and then an hour-long mountain bus to the trailhead.
- To hike Mt. Fuji, you’ll need to book and pack accordingly:
- Except for the Yoshida Trail, reservations are not required. You can pay the entrance fee near the trailheads.
- Reserve a mountain hut before it gets full. You’ll need to reserve them starting in June for the more popular routes.
- Don’t underestimate mountain weather, and pack accordingly. One person in my group turned around because he didn’t bring enough layers to withstand the cold.
How To Guide & Tips
Interested in hiking Mt. Fuji after reading my review? Below is a practical how-to guide and firsthand tips.
When to Hike
Mt. Fuji’s official climbing season is from early July to early September every year. See the official website for the most up-to-date information.
During the climbing season, the trails are open and accessible (e.g., trail signs are visible, weather conditions are not dangerous, and facilities are operational).
You can technically hike it during the off-season, but it’s not recommended because it becomes significantly riskier.
I hiked it on September 8th and 9th of 2023, right before it closed for the 2023 season.
Learn what visiting Japan in September is like.
How Hard Is It
Mt. Fuji is considered a challenging hike. As a decently strong hiker, I found it medium-hard. It’s not a long trek (I thought the Inca Trail hike to Machu Picchu was more challenging), but it has a steep ascent and descent.
Consider these five factors when assessing the difficulty:
- 🤢 Altitude sickness – Mt. Fuji is 12,388 feet above sea level. Many people will have symptoms starting at 10,000.
- 📈 Elevation gain – This varies by trail, ranging from 4,819 to 7,723 feet. All trails have steep inclines, especially near the summit, where you’re basically doing a two-hour StairMaster workout.
- ❄️ Unpredictable weather – The weather can change drastically and become severe. The summit can drop to 30 °F with strong winds of over 27 mph.
- 💤 Hours of sleep – You’ll likely only get five to six hours of sleep in a mountain hut. Most hikers go to bed after 8 pm and wake up between 2 am and 3 am to summit for the sunrise.
- 🥾 Trail choice – The four main routes have different characteristics, so some are more challenging than others due to length, steepness, and terrain differences.
Most people don’t need to hire a guide to hike Mt. Fuji because the trails are clearly marked. A guided tour is only recommended for less experienced hikers.
How Long Is It
You can climb Mt. Fuji in one day (known as “bullet climbing”) or two days. On average, you can finish in 8 to 10 hours.
Below are the average times to climb each route. The durations do not reflect the difficulty of the trails. For example, the Subashiri Trail is longer than the Yoshida Trail, but the average time is shorter because it’s less crowded, and more experienced hikers do the former.
| Trail | Total | Ascent | Descent |
|---|---|---|---|
| 🥾 Yoshida Trail | 10 hrs | 6 hrs | 4 hrs |
| 🥾 Gotemba Trail | 10 hrs | 7 hrs | 3 hrs |
| 🍀 Subashiri Trail | 9 hrs | 6 hrs | 3 hrs |
| 🥾 Fujinomiya Trail | 8 hrs | 5 hrs | 3 hrs |
It took me 5 hours to ascend and 3 hours to descend the Subashiri route over two days. I went at a decently fast pace but also made several stops. Most people in my group took 9 to 10 hours. A very strong hiker can likely complete it in less than 7 hours.
Choosing a Trail
Mt. Fuji has four trails; the best trail depends on your preferences and comfort level. Below are the pros and cons of each one in order of popularity.
📍 Trailheads Map
1. Yoshida Trail: Most Popular Route
62% of hikers did the popular Yoshida Trail in 2023.
Trail Length: 8.6 miles
Elevation Gain: 4,819 feet
- 👍 Pros: It’s popular because it’s the easiest to access from Tokyo and has the most facilities (e.g., shops, first-aid centers, toilets, mountain huts). It is considered the
“beginner’s trail,” but be warned that it’s not an easy hike. - 👎 Cons: This is the route people refer to when they criticize the overcommercialization of Mt. Fuji. Overcrowdedness means more litter, traffic, and trail damage.
Due to its popularity, reservations are required for the Yoshida Trail.
2. Fujinomiya Trail: Fastest Route
22% of hikers did the Fujinomiya Trail in 2023.
Trail Length: 5.1 miles
Elevation Gain: 4,350 feet
- 👍 Pros: It’s the easiest to access from Western Japan and is the shortest route at eight hours. It has a relatively good number of facilities, including one first-aid station and several shops.
- 👎 Cons: It’s very rocky and steep. It’s also the only trail with the same ascending and descending routes, so you get the same views and terrain both ways.
3. Subashiri Trail: Most Scenic Route
9% of hikers did the Subashiri Trail in 2023. This is the route I chose, and I write about it in detail below.
Trail Length: 7.8 miles
Elevation Gain: 5,718 feet
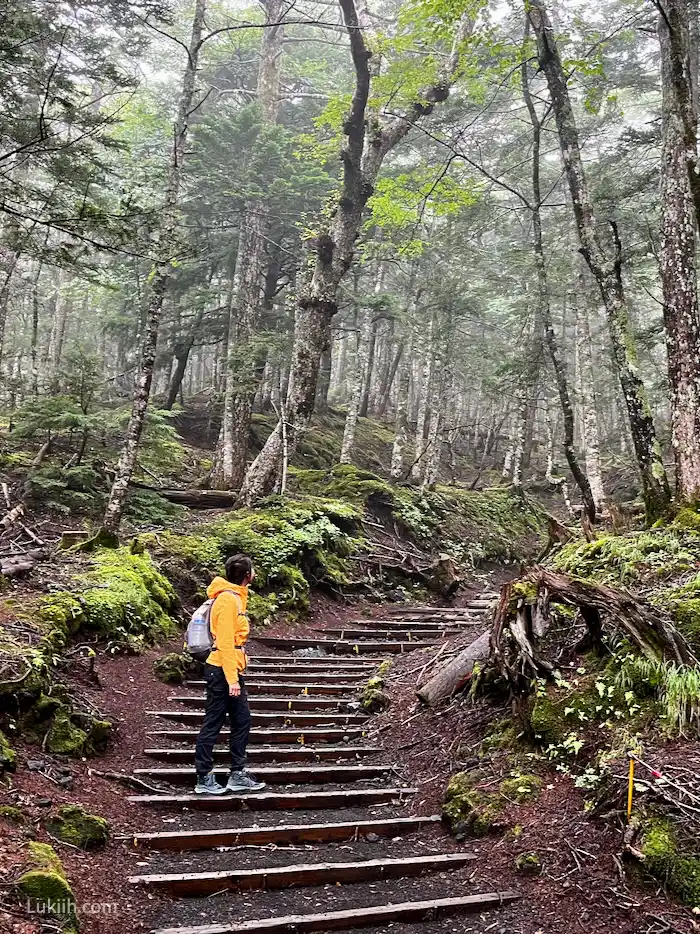
- 👍 Pros: It’s considered the most scenic route and has the highest tree line, so you experience forest and volcanic atmospheres. Compared to the first two trails, it’s significantly less crowded, making it a serene hike.
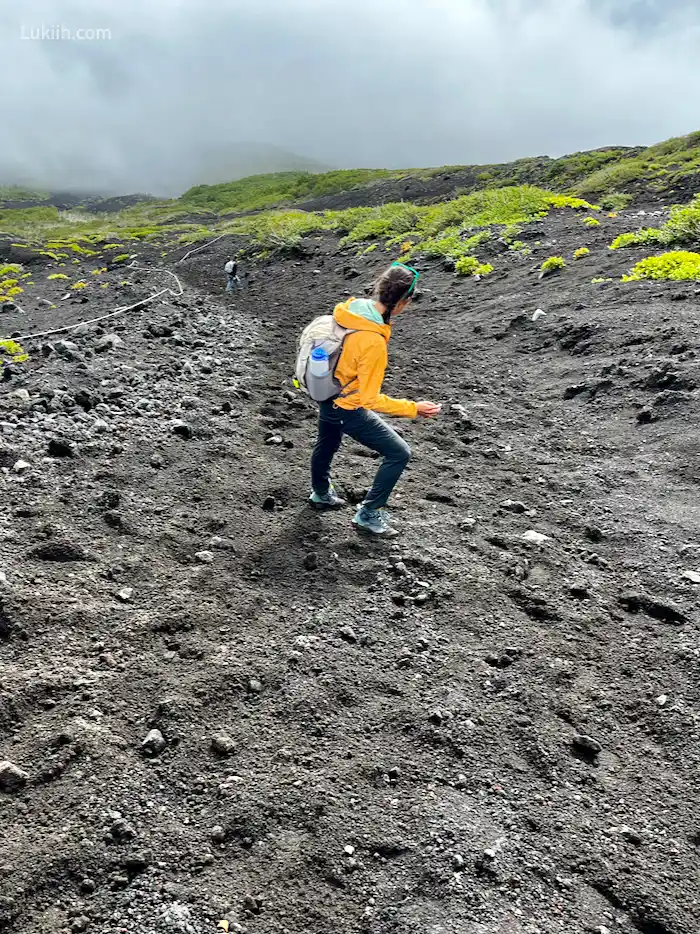
- 👎 Cons: Because it has fewer climbers, it doesn’t have many amenities and only has a few shops, toilets, and no first-aid centers. The descent is steep, and you’ll be on volcanic gravel for most of it.
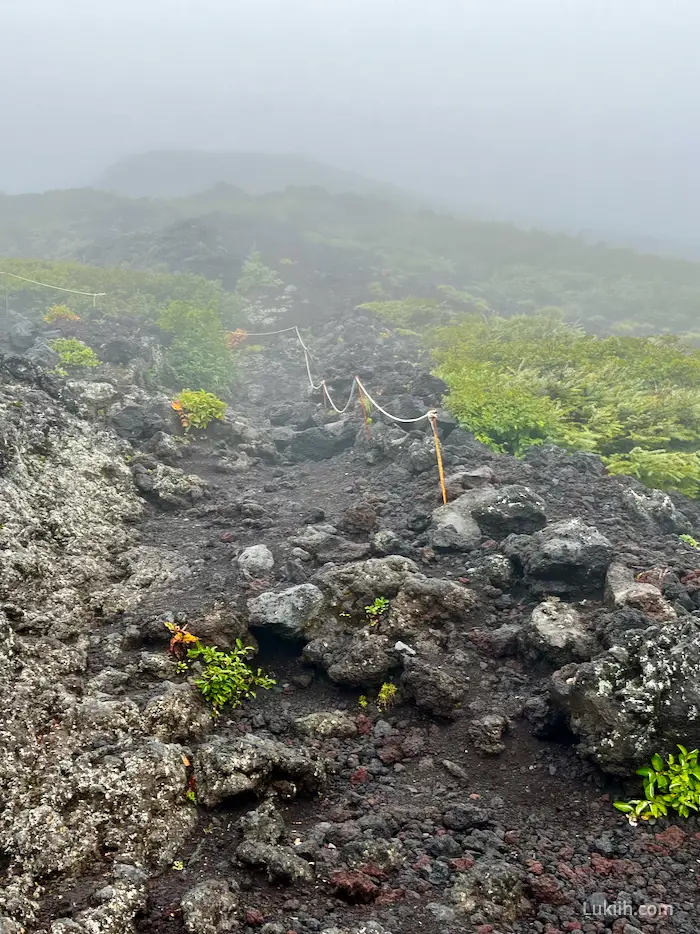
🍀 Lukiih’s Experience: I had a foggy day during my ascent on the Subashiri route, so I missed the great views on the way up. However, I didn’t see any other group for over 90% of the trail, which made my hike very serene. I particularly enjoyed the beautiful forest at the beginning. See my Subashiri Trail itinerary below.
🥾 The Subashiri Trail’s Terrain
Here’s what the Subashiri Trail’s terrain is like:
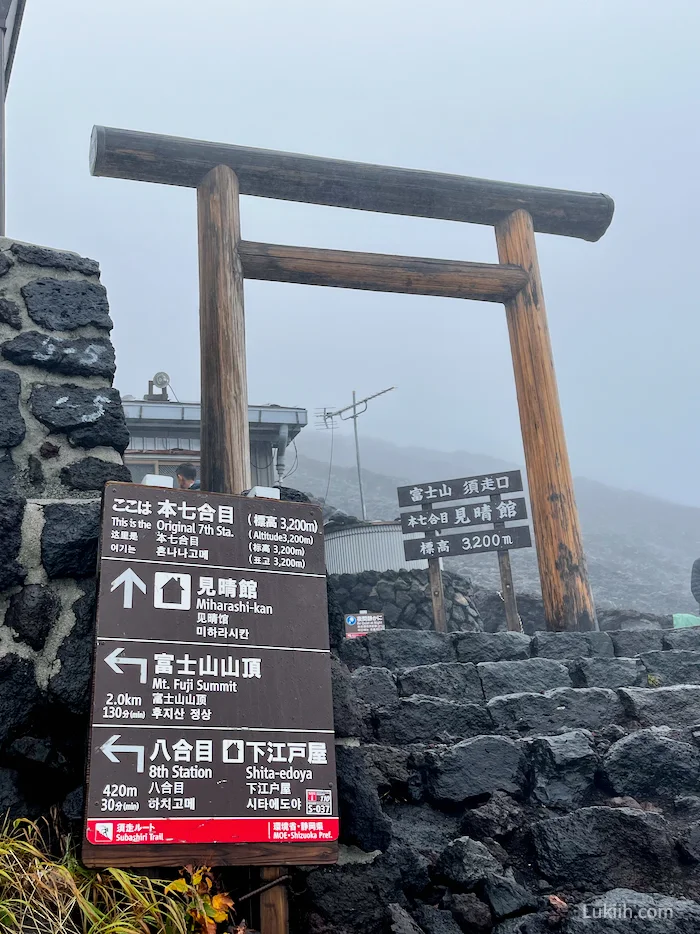
- Forest belt – It has the highest tree line, so you’ll spend the first and last hours in a beautiful forest belt that looks mystical in dense fog. This part of the terrain is sometimes rocky, but it’s mostly a gentle slope.
- Volcanic gravel – The rest of the ascending trail is volcanic gravel with constant switchbacks, and parts of this portion become very steep.
- Uphill climb – When the Subashiri Trail merges with the Yoshida Trail near the summit, it becomes a long stair workout with some rock scrambles.
- Volcanic gravel again – The descending trail is primarily a steep volcanic gravel route. The most efficient way to tackle it is to run down and use your momentum, but this can be very tough on your knees (I know because this is what I mostly did).
Hiking poles are highly recommended for going down the Subashiri Trail at a steady and controlled pace.
4. Gotemba Trail: Longest Route
7% of hikers did the Gotemba Trail in 2023.
Trail Length: 12.3 miles
Elevation Gain: 7,723 feet
- 👍 Pros: It’s the least crowded route, making it the most quiet trail.
- 👎 Cons: It’s the longest route with the least amenities. It also has the worst signage, so your chances of taking a wrong turn are higher.
The Gotemba Trail is generally recommended for more experienced hikers.
Entrance Fee & Donation
Most Mt. Fuji trails are free to hike. The Yoshida Trail has a 2,000 yen fee (about $13) and a limit of 4,000 hikers per day.
At the start of each trailhead, there are conservation donation stations, where people are encouraged to donate 1,000 yen (a little under $7).
All bathrooms have a small fee of slightly more than $1. They’re cash-only, so make sure to bring coins with you.
How To Get There
Here’s how to efficiently get to Mt. Fuji’s trailheads.
Step 1 – Take a train to one of the nearby towns.
- Yoshida Trail – Take a train to the Kawaguchiko Station on the north side.
- Fujinomiya Trail – Take a train to the Fujinomiya Station on the south side.
- Subashiri & Gotemba Trails – Take a train to the Gotemba Station on the east side.
Step 2 – From the bus station, take a direct bus to one of the fifth stations on the volcano, where you can start the hike.
Each trail has about ten stations. You will start at the fifth station of every route. For example, the Yoshida route begins at the Fuji Subaru Line 5th Station, while the Fujinomiya Trail starts at the Fujinomiya 5th Station.
🚌 How To Get To Subashiri Trail
The Subashiri Trail starts on the eastern side of Mt. Fuji at the Subashiri 5th Station. Here’s how I got to the starting point from Tokyo:
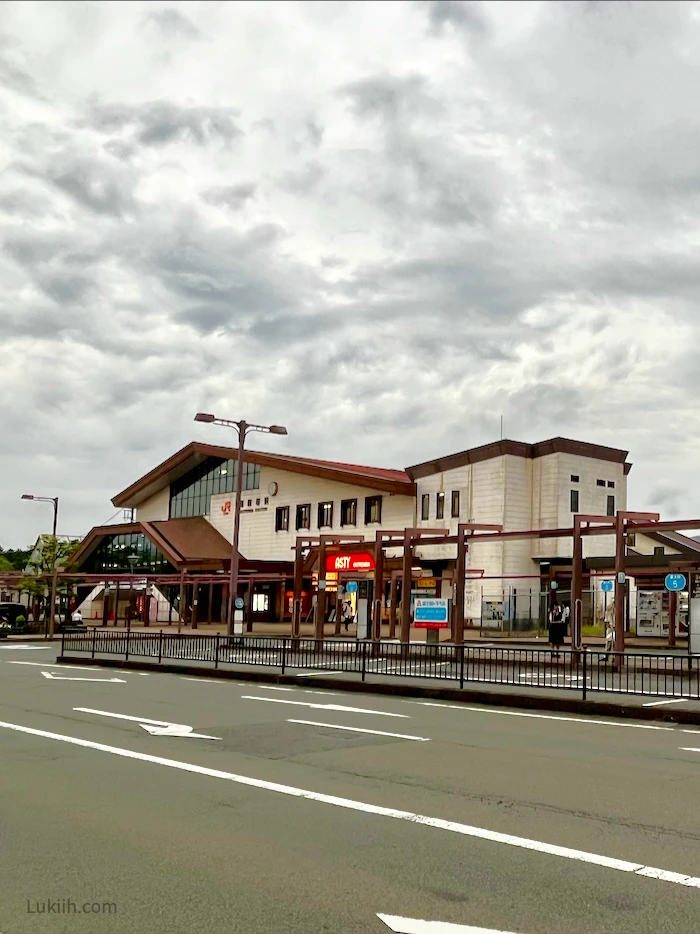
- Step 1 – Take a train to the Gotemba Station.
If you’re departing from Tokyo like I did, there is a train called the Romancecar that takes you directly from Shinjuku Station to Gotemba Station in under two hours. The Romancecar is a limited express train that is reservation-only and costs about $20.
- Step 2 –Take the “Subashiri Trail 5th Station” bus from the bus station a few feet outside Gotemba Station. Buy a bus ticket at the kiosk, which will cost about $16. See the bus timetable.
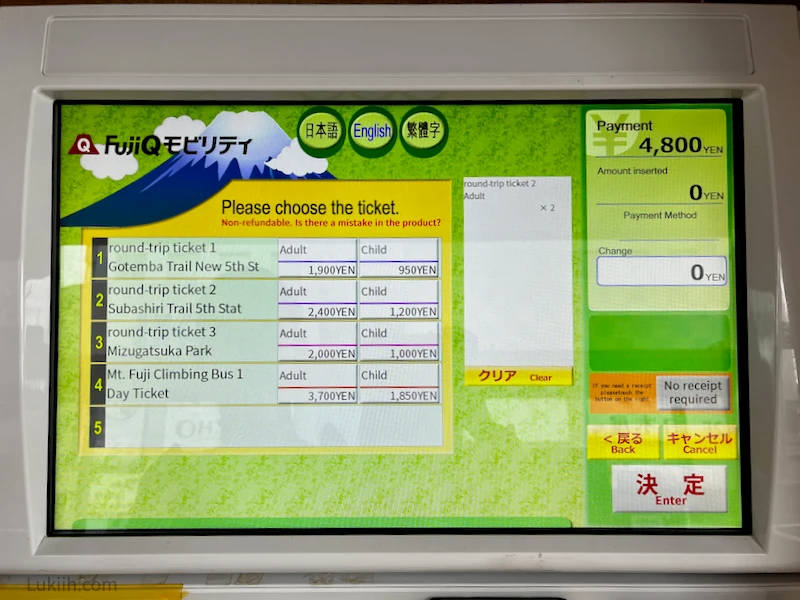
Start lining up for the bus about 15 to 20 minutes before the scheduled departure. If you’re one of the last people to get on the bus, you might not get a seat for the hour-long ride.
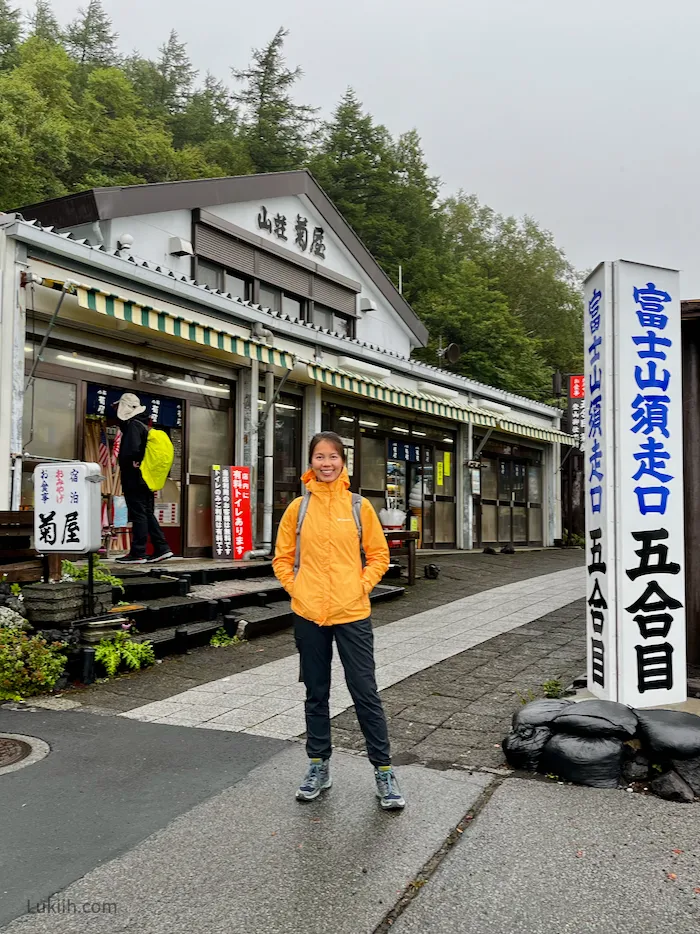
- Step 3 – The bus will take you to the Subashiri trailhead. At the Subashiri 5th Station, you’ll see a bathroom (which costs 200 yen) and two souvenir shops a few feet away from the starting point.
Where To Stay
Every trail on Mt. Fuji has mountain huts for overnight stays. The more popular the trail, the more huts there are (e.g., the Yoshida Trail has over 15 of them while the Gotemba Trail only has a few).
🛖 What To Expect
Here’s what to expect when staying in a mountain hut:
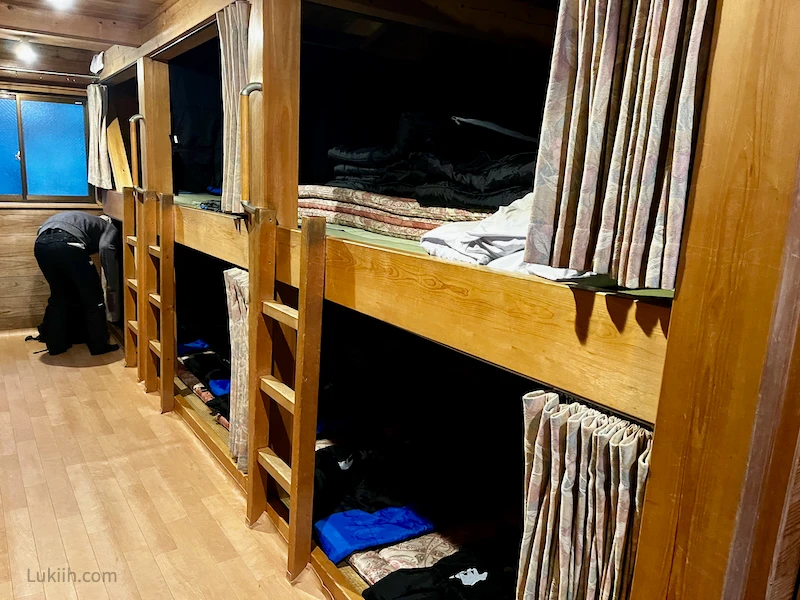
- Dorm-style – Most mountain huts have a hostel sleeping arrangement where each hiker gets a sleeping bag in a shared space. Very few mountain huts have private rooms, which are just spaces separated by curtains.
- No showers – There is no hot running water on the mountain. You can bring baby wipes to freshen up if you like.
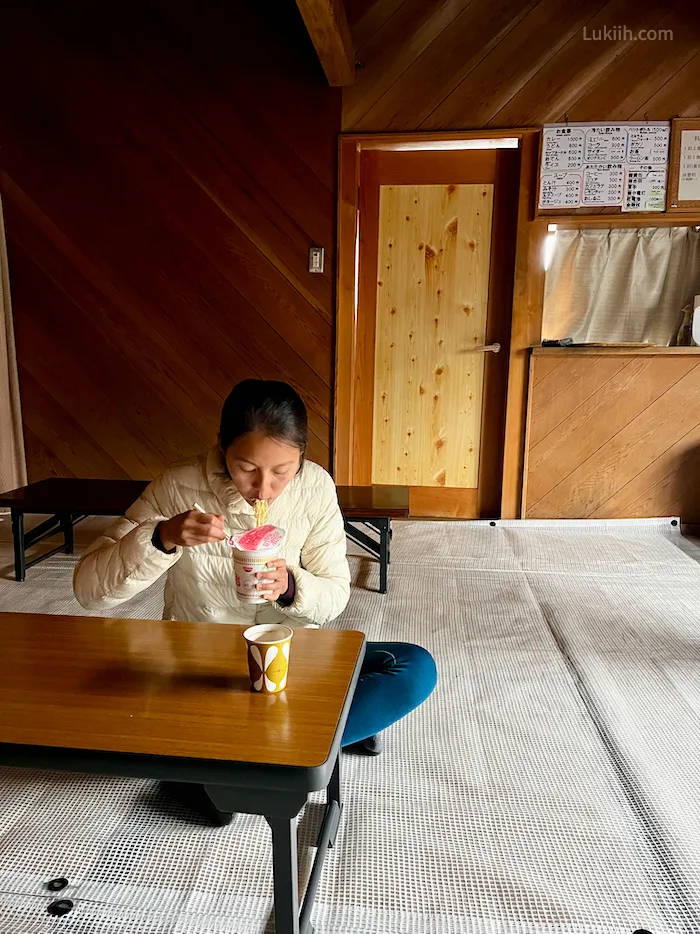
- Basic food – Mountain huts provide basic dinner and breakfast. Don’t expect these meals to be phenomenal. Remember that you’re very high up in the mountains with limited facilities. My hut provided Japanese curry for dinner and onigiri for breakfast.
- Curfew – Mountain huts generally have a curfew so you don’t disturb other hikers. Most people sleep around 8 pm and wake up early, between 2 am and 3 am, to do the summit push before sunrise.
- Outdoor shoes – Like in many Japanese accommodations, outdoor shoes are expected to be left by the entrance.
Learn other proper Japanese etiquette.
- Wet clothes – If it rains during your hike, try to stay as dry as possible by bringing rain gear. Many mountain huts don’t have a proper way to dry clothes.
🏠 Where To Stay on the Subashiri Trail
The Subashiri Trail has limited mountain huts, so booking in advance is essential. You can book online or by calling them (I had a Japanese-speaking friend call on my behalf).
I stayed in Miharashikan Hut for $64 on the 7th station, which was ideal.
- Location – The 7th station is near the halfway point of the Subashiri route’s ascent. That means I spent three hours hiking up on the first day and two hours on the second day.
- Cozy atmosphere – The hut is relatively small and new compared to others. It provides a simple but cozy atmosphere with fewer people. In comparison, the 8th station hut is significantly larger and more crowded.
What To Pack
Unprepared hikers tend to underestimate Mt. Fuji’s bad weather, which can include heavy rain, strong winds, and cold temperatures, especially at the summit. Make sure you wear warm clothing and bring proper equipment.
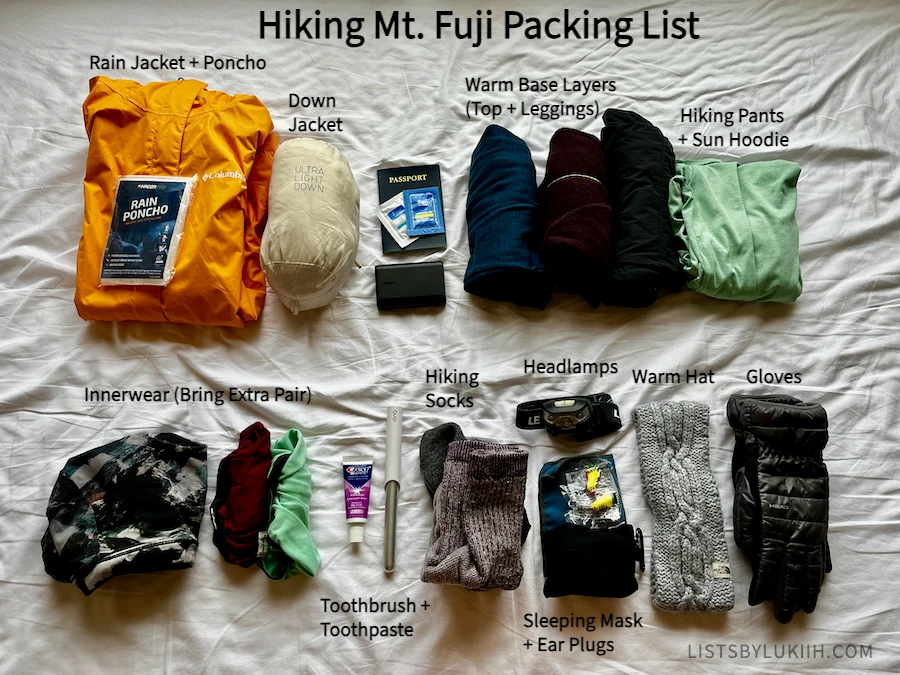
Here’s a complete packing list for spending two days on Mt. Fuji:
- Rain gear – I brought a rain jacket and a rain poncho in case of a downpour.
- Hiking shoes – Make sure they’re waterproof.
- Headlamp – You’ll need headlamps for the night climb before sunrise.
- Warm outer jacket – I brought my light down jacket but wished I had brought something heavier because the summit was colder than anticipated.
- Warm base layers – The weather changes from the base of the mountain to the top, so layering is essential. I brought my Smartwool top and leggings.
- Athletic top and hiking pants – Your hiking pants should be at least water-resistant if they’re not waterproof.
- Hiking poles – The descent on some trails is steep and composed of volcanic gravel. Hiking poles are highly recommended to go down at a steady and controlled pace.
- Innerwear – Bring an extra pair, as you’ll probably want to change your sports bra and underwear for the second day of hiking.
- Warm hiking socks – I brought my hiking socks to stay warm and dry.
- Reusable water bottle – I brought a 24 oz. water bottle, which was sufficient. You can refill it by buying bottled water at certain stations.
- Earplugs and sleeping mask – You’re sleeping in a shared space, so bring these to help with noise.
- Gloves – The summit can drop to 30 °F with strong winds of over 27 mph, so wear gloves.
- Hat – For the same reason as above, bring a warm hat. I brought a headband which was not sufficient at the summit.
- Toothbrush and toothpaste
- Day pack and backpack rain cover – If you forget a rain cover like I did, you can drape a trash bag around your day pack if it starts raining.
- Snacks – Before your hike, visit a convenience store, like 7-Eleven, Family Mart, or Lawson, to stock up on snacks. Small shops on Mt. Fuji sell limited snacks at a higher price.
The Japan trip planner below has this Mt. Fuji packing list in a downloadable format.
What Facilities Exist
Mt. Fuji has small shops, public toilets, and first-aid centers. The popular Yoshida Trail has many of these, while the uncrowded Gotemba Trail doesn’t even have a first-aid center.
Based on my experience on the Subashiri Trail, here’s what you can expect from the facilities:
- Public toilets – The toilets cost a little less than a US dollar (about 200 yen) and have cold running water, toilet paper, and a small sink.
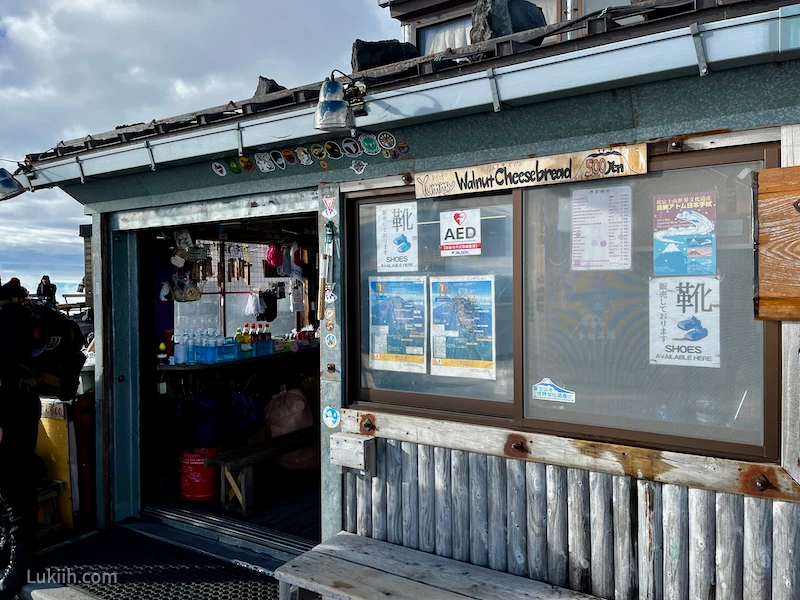
- Small shops – Certain stations have small shops that sell food like cup noodles, sports drinks, rice curry, water, and beer. Most shops are small and simple, while the bigger shops near the 8th station also sell instant hot chocolate/coffee, bread, and souvenirs.
What’s at the Summit
The summit of Mt. Fuji is more than just a place to view the sunrise.
- Shops – There are a few shops where you can purchase simple food, souvenirs, and beverages. There’s even a post office where you can send a postcard from Japan’s tallest mountain. All the shops open around 6 am.
- Shelters – The top tends to be extremely cold and windy with very few shelters. Since the shops don’t open until 6 am, prepare accordingly.
- Extra hiking – You can also do extra hiking at the top. A walk around the crater’s rim takes about an hour and passes some shrines.

Itinerary
Below is my Mt. Fuji itinerary while hiking the Subashiri Trail in September 2023.
| 🏔️ Day 0 | |
| 4 pm | Arrive in Gotemba City from Tokyo by train |
| 4:15–4:30 pm | Check into The Gotembakan Hotel* |
| 5–8 pm | Visit the Gotemba Premium Outlets |
| 🏔️ Day 1 of Hiking Mt. Fuji | |
| 7:30–8:30 am | Eat breakfast and get snacks at 7-Eleven |
| 8:40–9:45 am | Buy bus tickets, pack and store luggage at the Gotemba Station |
| 10:10–10:30 am | Start lining up for the bus |
| 10:30–11:30 am | Take the bus from Gotemba City to Subashiri 5th Station |
| 11:30–12 pm | Check out the souvenir shops at the 5th Station |
| 12–3 pm | Ascend the Subashiri Trail from the 5th Station to the mountain hut |
| 3–8 pm | Eat dinner and meet other hikers at the mountain hut |
| 8 pm–3 am | Sleep in the mountain hut |
| 🏔️ Day 2 of Hiking Mt. Fuji | |
| 2:45–3 am | Eat breakfast and get ready to summit |
| 3–5 am | Summit push |
| 5–6:30 am | Watch the sunrise and walk around the summit |
| 6:30–9:30 am | Descend the Subashiri Trail |
| 9:45–10:45 am | Take the bus back to Gotemba City |
🏠 Where To Stay in Gotemba City
The Gotembakan is a great hotel if your primary goal is to hike Mt. Fuji.
It’s located directly in front of the train and bus stations, includes a complimentary hearty breakfast, and is near a 7-Eleven, where you can stock up on snacks.
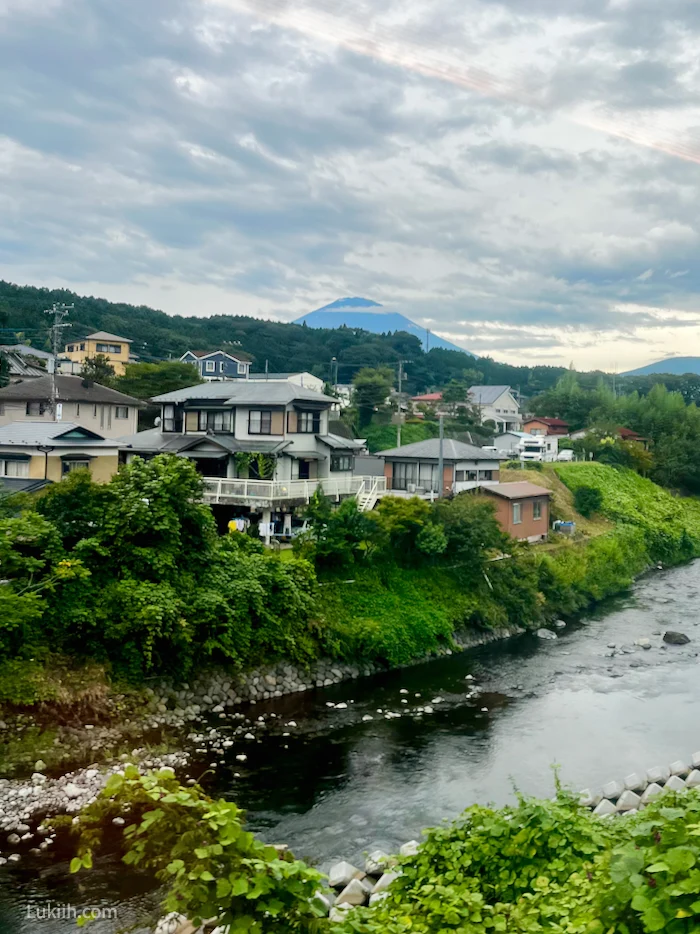
The rooms aren’t particularly nice, but they’re affordable and have a good view of the volcano on clear days.

Japan Trip Planner 2026
Make planning easier with my flexible, research-backed travel planner—shaped by real experience. It has:
- 2026 travel info
- Curated itinerary
- Practical insights & tips
- Simple budget tracker
- Destination-specific packing list
- Fully customizable sections
Built in Notion, this is the tool I personally use to plan every trip. I genuinely love it and creating a Notion account is free.
Lists by Lukiih is a small site I fund myself. Downloading my trip planner is the best way to support me and keep it running—thanks!

Japan Travel Guides
- 🇯🇵 Planning a Trip to Japan: 12 Practical Things To Know
- ⛩️ 10 Epic Days in Japan: A Unique & Active Itinerary
- 💰 My Japan Trip Cost: Budget Breakdown (2025)
- 🌋 Hiking Mt. Fuji: Honest Review & Tips
- 🚲 Cycling Shimanami Kaido: Honest Review & Tips
- ⛩️ Fushimi Inari Taisha: Honest Review & Tips
- 🙅🏻♀️ Etiquette in Japan: 13 Things Tourists Should Not Do
- ☀️ Visiting Japan in September: Tips & What To Know
- ❄️ Visiting Japan in December: Tips & What To Know