The Shimanami Kaido is a scenic cycling route that passes through six rural Japanese islands. Using a clear travel rating system, I share what the biking experience is like—plus tips from my own trip.
Lists By Lukiih is readers-supported. When you buy with my affiliate link, I may earn a small commission. Thanks!
🍀 Lukiih’s Verdict
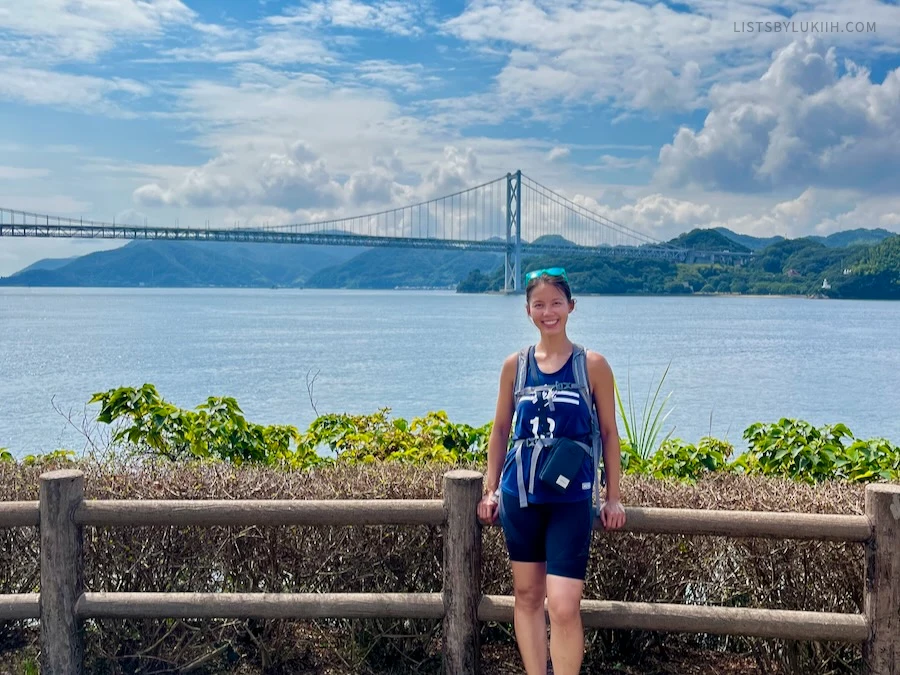
Biking the Shimanami Kaido was one of the highlights of my trip.
- It’s an off-the-beaten-path, active experience with beautiful scenery, uncrowded attractions, and the best soft-serve ice creams I’ve ever eaten. The biking route is accessible to both beginners and avid cyclists.
- The experience is affordable, even after accounting for bike rentals, accommodations, food, and entrance fees.
- Extensive preparation is required, as you need to have some endurance, reserve a bike, book accommodation, pack accordingly, and figure out what to do with your luggage.
🇯🇵 Planning a Trip to Japan: 12 Practical Things To Know
🏆 Where Does It Rank?
The Shimanami Kaido ranks as the #3 experience I had in Japan. Here’s how it compares to other things I did on my trip:
⛩️ 10 Epic Days in Japan: A Unique & Active Itinerary
✈️ About My Trip
For context on my review, here’s what to know about my trip:
- I finance my trips and don’t receive sponsorship; this review reflects my honest opinions.
- I biked the Shimanami Kaido in 2023, but this post has updated 2025 information.
- My Japan trip was in September when it was less crowded and expensive.
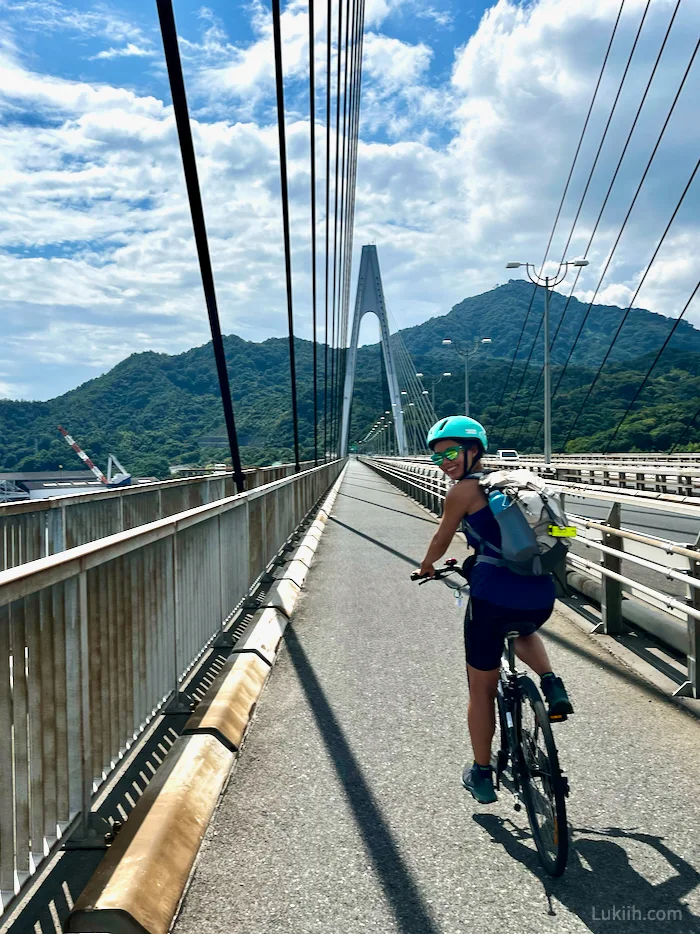
- Biking the Shimanami Kaido is a rare experience. It’s a dedicated cycling route that extends across six islands via a series of purpose-built bridges, making it a nearly one-of-a-kind experience.
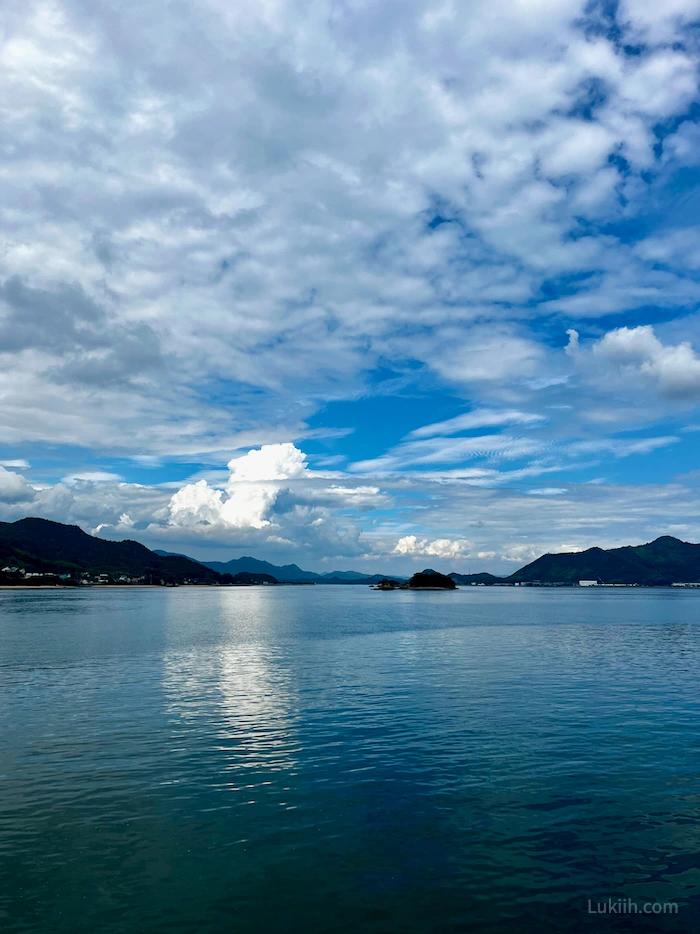
- The combination of diverse attractions, a serene environment, and excellent infrastructure makes it unforgettable.
- Other bike routes boasting coastal views, excellent cycling infrastructure, and cultural attractions exist worldwide. Comparable ones include Taiwan’s Cycling Route 1, Ireland’s Wild Atlantic Way, and Noto Peninsula Coastal Road.
- Although great collectively, most of the attractions and town areas along the route do not stand out on their own.
See my favorite attractions and stops below.
- Biking the Shimanami Kaido is a very enjoyable experience. It’s a choose-your-own-adventure experience where you bike at your own pace and spend as much or as little time as you like at the various attractions.
- Visiting a more rural side of Japan is a nice break from the tourist cities of Tokyo, Kyoto, and Osaka.
- It’s also a rewarding route to complete. The recommended route is not particularly difficult, but it takes at least eight hours to complete. You’ll need to climb a few hills and bike up six bridges with a medium incline.
- It’s a strenuous activity, so if you’re not used to biking more than 20 miles in one day, the last few miles can be exhausting.
- It’s not a “community” experience where you’ll learn a lot. It’s a tranquil bike ride in a country known for its cultural differences. Most locals keep to themselves, and everyone bikes at their own pace, so don’t expect engagement unless you come with a group.
Cycling Shimanami Kaido over two days costs between $120 and $250. I spent $223. Here’s how the costs break down (I last checked prices in January 2025):
- 🏠 Accommodation: $30-$100/night – There are a few accommodation options along the route. I spent $96 a night since I splurged on where I stayed.
- 🍱 Food: $10-$25/day – Dining options include quick, cheap stops and nicer sit-down places. I spent $61 on food since I stopped at a nice sit-down sushi.
- 🚲 Bike rental: $20+/day – A standard bike (which is what I rented) starts at $20 a day. Much nicer carbon bikes are also available.
- 🧳 Luggage shipping: $5-$15 total – Shipping your luggage to your final destination is more expensive than storing it. I shipped mine for $15.
- 🎟️ Attractions: $0-$20 total – The route offers free attractions and ones with entrance fees. I spent $10 on Kousanji Temple.
If you’re a less experienced biker and prefer a hassle-free experience that requires less preparation, consider booking a guided Shimanami Kaido tour.
💰 My Japan Trip Cost: Budget Breakdown (2025)
- The only skill you need is knowing how to ride a standard bike. You need some endurance to bike for several hours, but you can go at any pace and make as many stops as you like. To make it significantly easier, you can rent an electric bike.
- I’m not an avid cyclist, but I often use my bike to get around where I live. Two weeks before biking the Shimanami Kaido, I did a 30-mile bike ride, which was sufficient preparation for me.
- The endpoints of the Shimanami Kaido require significant effort to reach.
- For most travelers, these cities are relatively far from popular tourist areas (i.e., about 2-4 hours from Kyoto or Osaka).
- It’s a straightforward journey with Japan’s excellent train infrastructure. However, depending on your route, you may have to take a bus between the endpoints.
- To cycle the Shimanami Kaido, you’ll need to book and pack accordingly:
- I recommend reserving your rental bike even though it’s not required by all companies. I overheard a visitor not being able to get a bike in the correct size because she didn’t reserve ahead.
- Book accommodation in advance, as the route has limited options.
- Don’t underestimate island weather; pack accordingly.
- Lastly, have a plan to store or ship your luggage.
How To Guide & Tips
Interested in cycling the Shimanami Kaido after reading my review? Below is a practical how-to guide and firsthand tips.
How Difficult Is It
When determining the difficulty of the cycling route, consider its duration, route options, and elevation gain.
🗓️ Duration
The Shimanami Kaido can be biked in one or two days. Minimizing stops and primarily focusing on biking will take roughly eight to nine hours to complete.
With an electric bike, it can be even shorter and take about five to six hours.
I wanted to enjoy the stunning scenery and make a few stops, so I took two days.
- First day – I spent about 3.5 hours on the route from 10:30 am to 2 pm. I made four stops along the way and spent the rest of the day exploring the Setoda area on Ikuchi Island.
- Second day – I spent about six hours on the route from 10:30 am to 4:30 pm. I made three significant stops, one of which was an hour-long lunch.
💪 Route Options
I would characterize the Shimanami Kaido as a medium-difficult cycling route. A fit person with some cycling experience will find it doable, but a less active person will find it somewhat challenging.
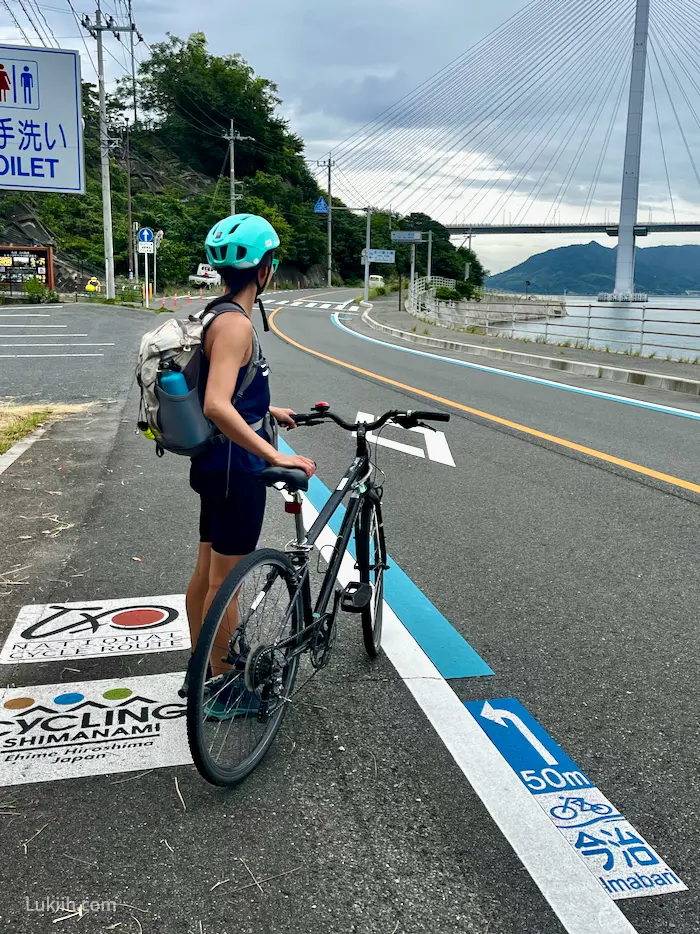
It has three routes that vary in difficulty:
| Route | Route Characteristics |
|---|---|
| Recommended | – Main route – Mostly flat – Easiest route (the one I did as a fit person who’s not a cyclist) |
| Intermediate | – Longer route – More hilly – Would be challenging for a fit person |
| Advanced | – Longest route – Steep hills – Would be very challenging even for a fit person |
The official length of the recommended route is 37 miles, but the total length of the ride is closer to 45 miles since you’ll need to drop off your bike at the rental terminals.
📈 Elevation Gain
The cycling route is mostly flat except for two areas on Oshima Island (the fourth island) with steep ascents and descents.
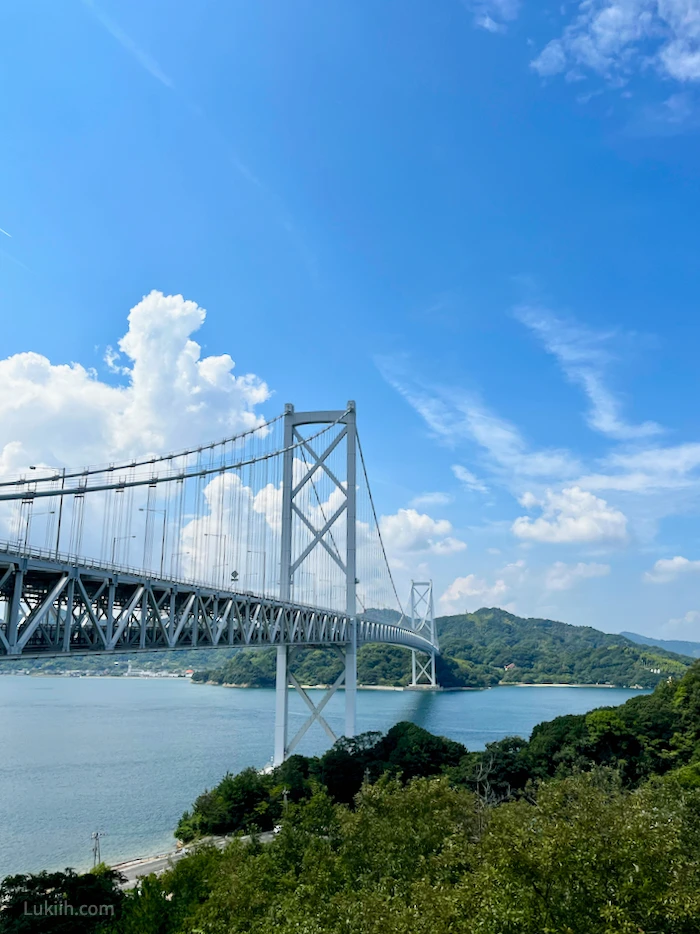
You’ll also have to bike up all six bridges to reach the next island, and these are their elevation gains:
- Innoshima Bridge – 165 feet
- Ikuchi Bridge, Tatara Bridge, Omishima Bridge, and Hakata-Oshima Bridge – all have slightly shorter elevation gains than Innoshima.
- The Kurushima-Kaikyo Bridge – 230 feet
How To Get to the Start
The Shimanami Kaido starts in Onomichi City and crosses the six islands to reach the final destination, Imabari City.
You can also bike the route in the other direction, starting from Imabari City.
🤔 Where To Start
There’s not much difference between starting in Onomichi versus Imabari. It depends on where you’re coming from, where you’re headed afterward, and when you want a longer train ride.
I started in Onomichi for a shorter train ride from Kyoto before the bike ride. A friend who did the Shimanami Kaido was headed to Hiroshima afterward, so she started in Imabari to have a shorter train ride after the bike ride.
📍 Starting in Onomichi
To start the Shiminami Kaido from Onomichi City:
- Step 1 – Take a train to the JR Onomichi Station.
- Step 2 – Walk five minutes to the nearby rental station to pick up your rental bike.
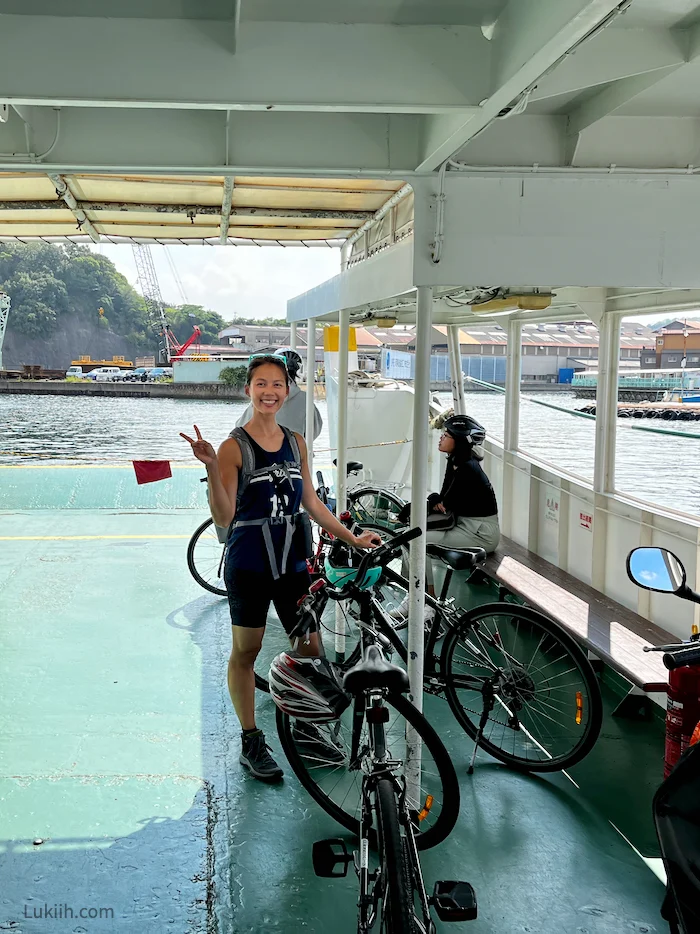
- Step 3 – Take the four-minute ferry at the Onomichi Port to the start of the bike route. The ferry costs 110 yen (cash), which is a little under a dollar. It departs every five to ten minutes.
📍 Starting in Imabari
To start the Shiminami Kaido from Imabari City:
- Step 1 – Take a train to JR Imabari Station.
- Step 2a – From the train station, rent a bike from the nearby rental station and then bike through parts of Imabari City to the Shimanami Kaido.
- Step 2b – Alternatively, from the train station, you can take a 30-minute bus to Sunrise Itoyama to rent a bike and start biking from there.
If you get lost, use Google Maps’s “walking mode” to find your way around by bike. Do not use the driving mode, as it can take you on the highway.
Where To Rent a Bike
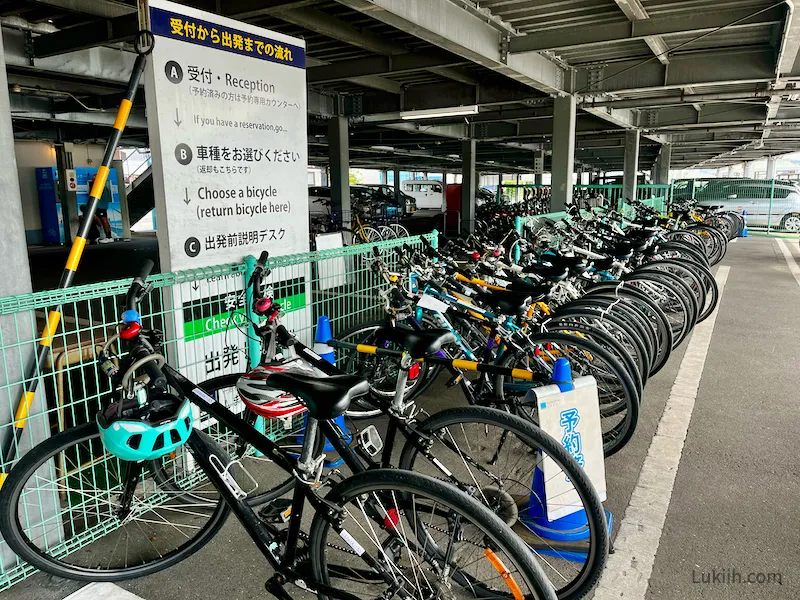
Although there are a few rental companies, only Shimanami Japan and Giant allow you to drop off the bike in a different location than where you picked it up.
🚲 Option 1: Shimanami Japan
Shimanami Japan has a cheaper and more flexible rental system. It has ten rental stations along the route and offers four types of bikes for a flat daily fee.
You can see the prices and make reservations online, but it’s not mandatory (you can reserve as late as 3 days before your trip). The rental includes helmets, lights, and bike locks.
I rented a hybrid crossbike from Shimanami Japan, and found the bike mediocre. The gears were decent, but the chain was noisy, the tire traction was fading, and the bike was heavy, which made going uphill much more difficult.
But I was able to finish with it and thought the prices were fair for what I received. If you’re going on the advanced route with steep hills, you need a nicer bike.
🚲 Option 2: Giant
The Giant rental system is the more expensive and high-end option. It only has two rental stations at both ends of the Shiminami Kaido.
The Giant bikes are much nicer (e.g., carbon road bikes), more expensive (i.e., more than double the regular bikes), and require reservations.
Where To Stay
When planning for the Shimanami Kaido, you’ll have to book accommodations at the ends of the route or somewhere in between.
Even if you plan to bike it in a day, the route is long enough that you’ll likely still need a place to stay at the end.
Accommodations Near the Halfway Point
If you’re biking the Shimanami Kaido over two days, a great place to stay overnight is on Ikuchijima Island, particularly the Setoda area.
Book accommodations along the cycling route at least one month in advance. There are not many options along the route, and some are booked out about four weeks in advance.
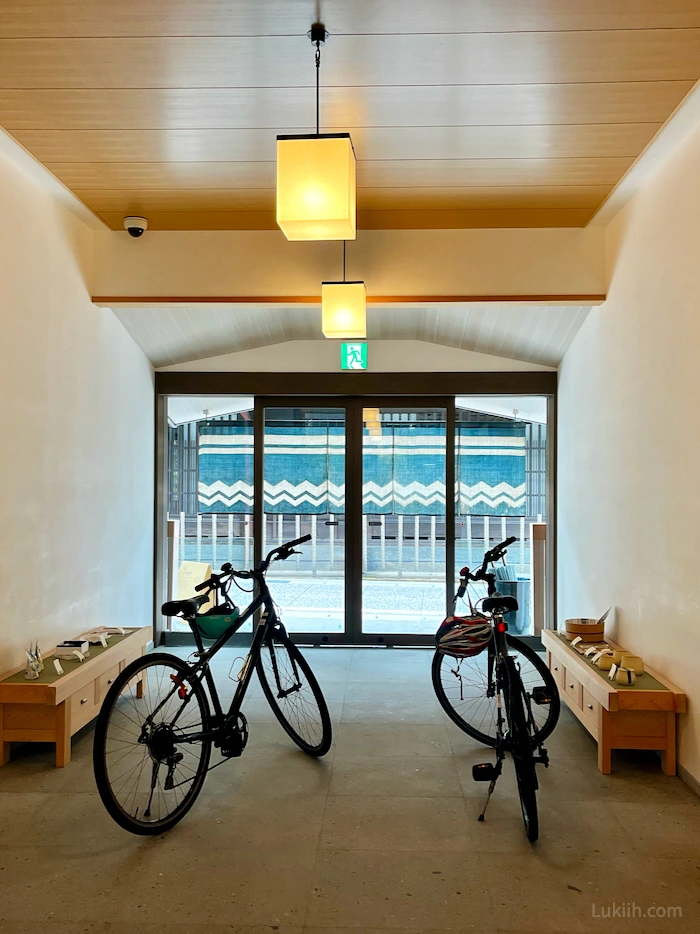
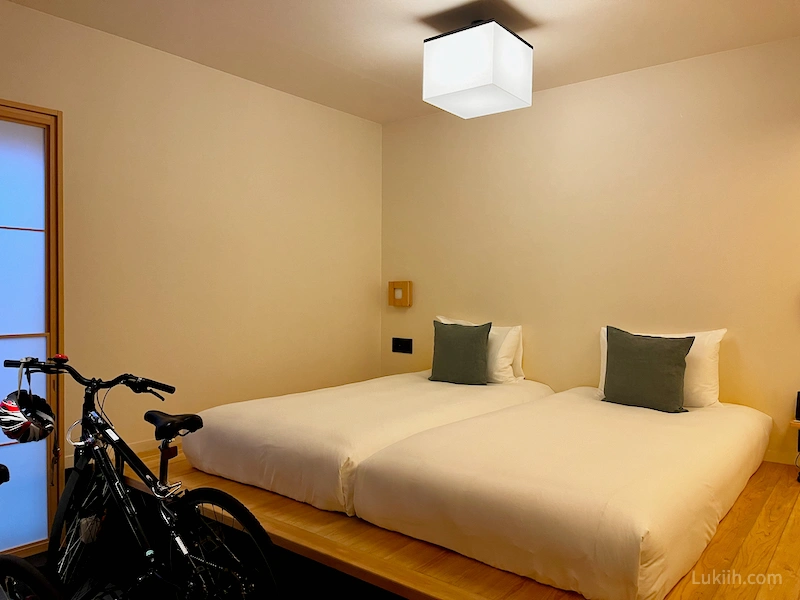
🏠 Where I Stayed: I splurged a bit on accommodations and stayed at Yubune for $96 a night per person (I split it with another person). It was my most expensive accommodation in Japan, excluding the ryokan I booked.
Yubune is a great hotel because its rooms are well-designed and accommodate bikes. It’s also located on the Shiomachi Shopping Street, so many attractions and restaurants are within walking distance.
💰 Budget Option: For a more budget accommodation option, 島宿Nest is located near Yubune and receives great reviews from its guests.
💰 Luxury Option: For a more high-end accommodation option, Azumi Setoda is a ryokan, a traditional Japanese inn that features a Japanese garden, sauna, and hot tubs.
Accommodations in Imabari City
Imabari City is a proper city, so you’ll have several accommodation options.
Consider staying near the Imabari Station for convenience. The train station is near a rental station, so you can easily pick up or drop off your bike rental upon arrival or departure.
🏠 Where I Stayed: I stayed at Imabari Urban Hotel, a budget hotel near the train station. For $30 a night, it provided everything I needed at the end of my bike trip.
💰 Budget Option: For an affordable dorm-room style guest house, Cyclo No Ie near the train station receives great reviews from cyclists.
Accommodations in Onomichi City
There are plenty of accommodations in Onomichi City near the train station.
💰 Budget Options: Apartment rooms for rent are available near the Onomichi train station, such as this one or this one.
💰 Mid-range Budget Option: Hotel Cycle is next to the ocean, right by the rental station, and has great reviews.
If you plan to ship your luggage to your Shimanami Kaido hotel, you’ll have to make sure it’s an accommodation that’s eligible for this service.
What To Pack
Below is a comprehensive Shimanami Kaido packing list for a two-day bike ride. Everything should be able to fit into a day pack.
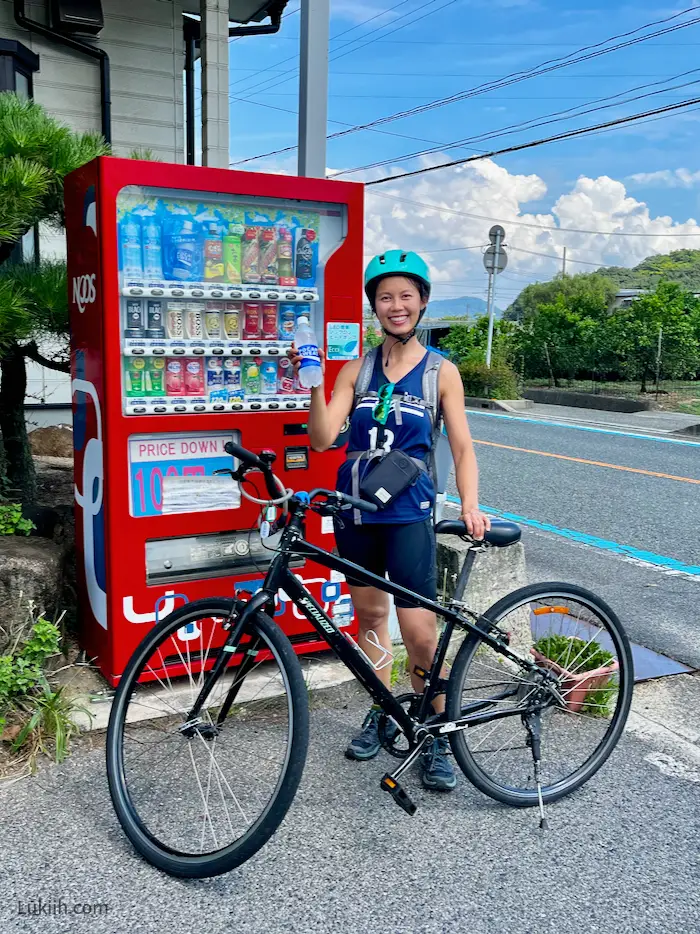
- Reusable water bottle – I brought my insulated 24 oz water bottle, which was sufficient because there were water fountains, convenience stores, and vending machines along the route.
- Padded bike shorts – I purchased these affordable bike shorts for this trip. The rental bike seat didn’t have sufficient padding, so I’m glad I wore them.
- Athletic top
- Wind jacket
If you’re biking in the summer, pack layers for sun protection (the island sun is very intense).
- Rain gear or poncho – You’ll want this if you’re biking during the rainy season.
- Cash – Several stops along the route are cash-only.
- Sunscreen – Most of the path is not covered, so wear sunscreen to protect yourself. I discovered my favorite sunscreen while in Asia. It spreads easily with a lotion-like texture and stays on, even through sweat.
- Sunglasses – Even if it’s not sunny during your ride, you’ll want sunglasses to protect your eyes from debris or wind.
- Day pack & pack cover – All items should fit in a day pack.
- Closed-toe shoes
- Toiletries (optional) – Most accommodations in Japan provide toiletries, including toothbrushes, toothpaste, and face wash.
The Japan trip planner below has this Shimanami Kaido packing list in a downloadable format.
What Not To Pack
Here are some things to consider leaving behind if you want to travel light:
- Umbrellas – They’re not allowed while biking. If you get rained on, a poncho is much more effective.
- Pajamas – Many mid-range (and even some budget) accommodations in Japan provide oversized, comfortable pajamas. I packed my pajamas and wished I hadn’t.
- Battery pack – If you have a decent phone, your battery should last seven to eight hours on the route.
How To Ship Luggage
If you want your luggage to arrive at your final accommodation, you’ll need to ship it there.
I shipped my luggage because I was starting in Onomichi City and ending in Imabari City. I didn’t want to worry about taking the bus back to Onomichi City after my bike ride.
I used Sagawa Express to ship my luggage from the Onomichi bike rental station to my accommodation in Imabari. Make sure that your hotel can:
- Receive shipped luggage – Luggage shipping is only available to and from certain accommodations and bike rental stations.
- Hold your luggage – Sagawa Express also required me to confirm that my hotel could store my luggage a day before I arrived (since I was biking for two days and they only do same-day delivery).
Attractions & Stops
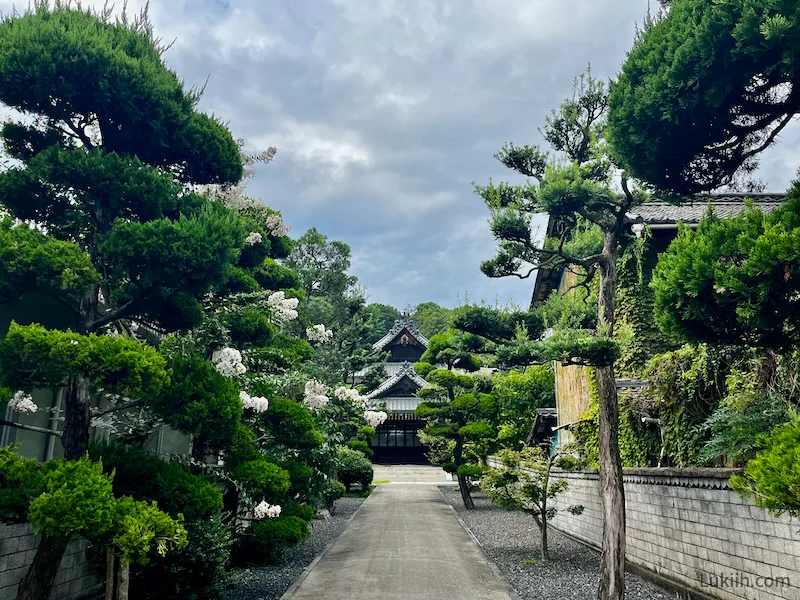
The Shimanami Kaido features over 20 attractions and activities. If you’re taking two days to complete it, I recommend stopping and resting in Setoda on Ikuchi Island, as it has great attractions and accommodations.
My favorite attractions and stops were:
🕊️ Kousanji Temple and The Hill of Hope
The complex is filled with well-known Buddhist architectural structures and has a fascinating cave. Its most famous attraction is the Miraishin no Oka marble garden (“The Hill of Hope”), which was largely empty when I visited.
💰 Entrance Fee: I paid 1,400 yen (about $10 USD). See the current price.

Check opening hours, as attractions and stores tend to close early on these Japanese islands.
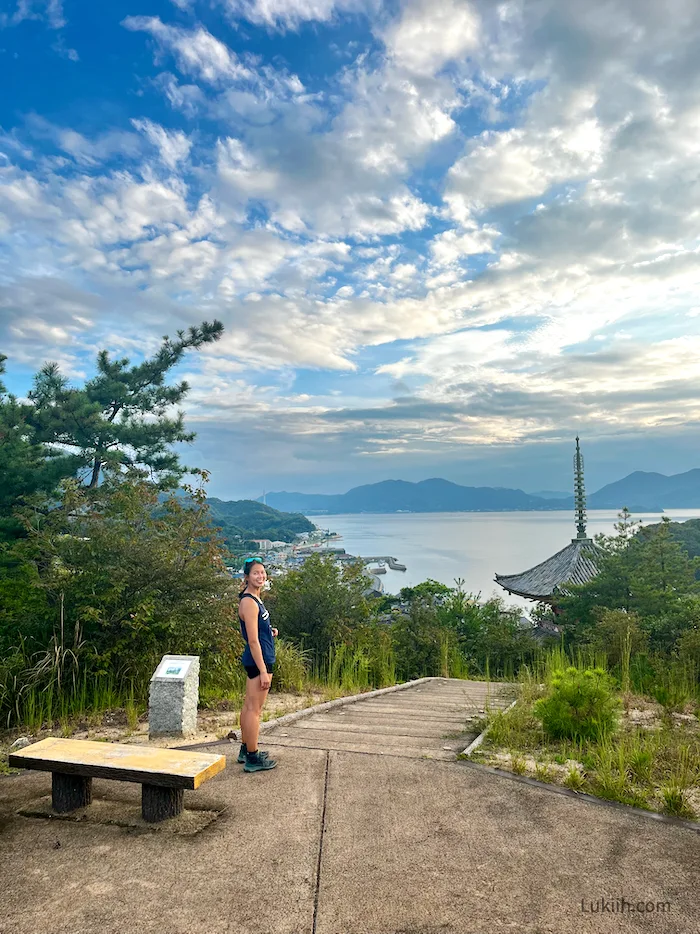
🌳 Choonzan Park
This park is a hidden gem I only found by chance. The path to the top of the hill is overgrown, and there are many mosquitos (I like this bug repellent), but it has a beautiful view and is an excellent spot for sunset.
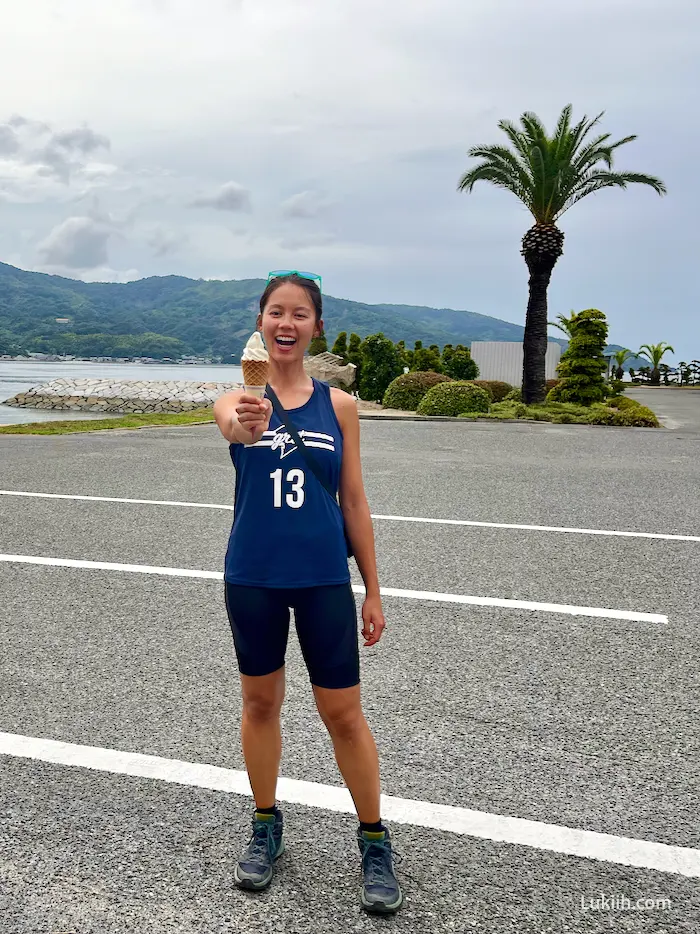
🍦 Hakata Salt Soft-Serve Ice Cream
There’s a vendor stall on Hakatajima Island that sells soft-serve ice cream made with Hakata salt. People travel to this roadside station just to eat this ice cream, which is one of the best I’ve ever had. This is a must-do stop.
💰 Cost: I paid 350 yen (about $2.50 USD) for an ice cream.
💴 Cash-only
🛍️ Shiomachi Shopping Street
This narrow shopping street has a traditional atmosphere and several shops selling food, souvenirs, and drinks. Walking down it was one of the most peaceful moments I experienced in Japan.
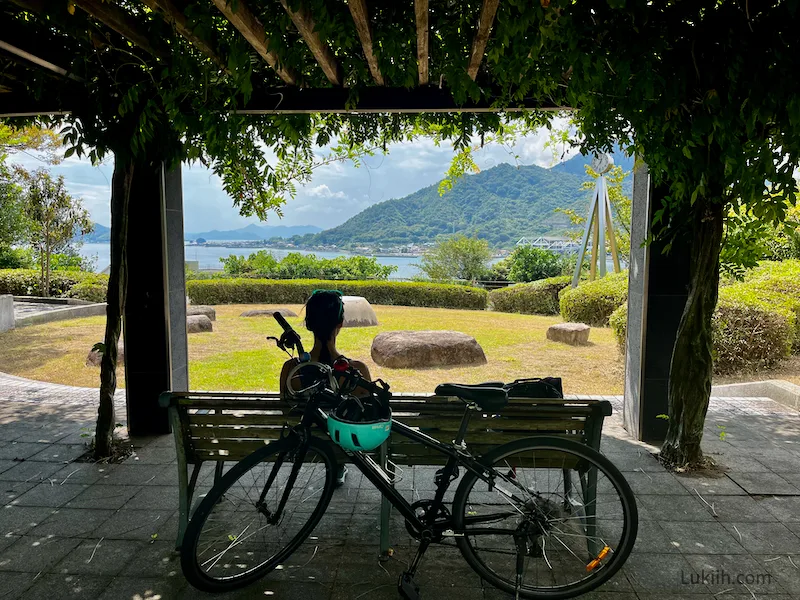
🌷 Rest Stops
The route has multiple parks, rest areas, and observation decks. One of my favorite rest stops was near the Ikuchi Bridge. It has a water fountain and a covered bench facing the ocean, making it a peaceful place for a quick break. Some locals brought lunch to enjoy here.
Japan Trip Planner 2026
Make planning easier with my flexible, research-backed travel planner—shaped by real experience. It has:
- 2026 travel info
- Curated itinerary
- Practical insights & tips
- Simple budget tracker
- Destination-specific packing list
- Fully customizable sections
Built in Notion, this is the tool I personally use to plan every trip. I genuinely love it and creating a Notion account is free.
Lists by Lukiih is a small site I fund myself. Downloading my trip planner is the best way to support me and keep it running—thanks!
Japan Travel Guides
- 🇯🇵 Planning a Trip to Japan: 12 Practical Things To Know
- ⛩️ 10 Epic Days in Japan: A Unique & Active Itinerary
- 💰 My Japan Trip Cost: Budget Breakdown (2025)
- 🌋 Hiking Mt. Fuji: Honest Review & Tips
- 🚲 Cycling Shimanami Kaido: Honest Review & Tips
- ⛩️ Fushimi Inari Taisha: Honest Review & Tips
- 🙅🏻♀️ Etiquette in Japan: 13 Things Tourists Should Not Do
- ☀️ Visiting Japan in September: Tips & What To Know
- ❄️ Visiting Japan in December: Tips & What To Know